


TT01E EURO TRUCK TUNING AND RULES
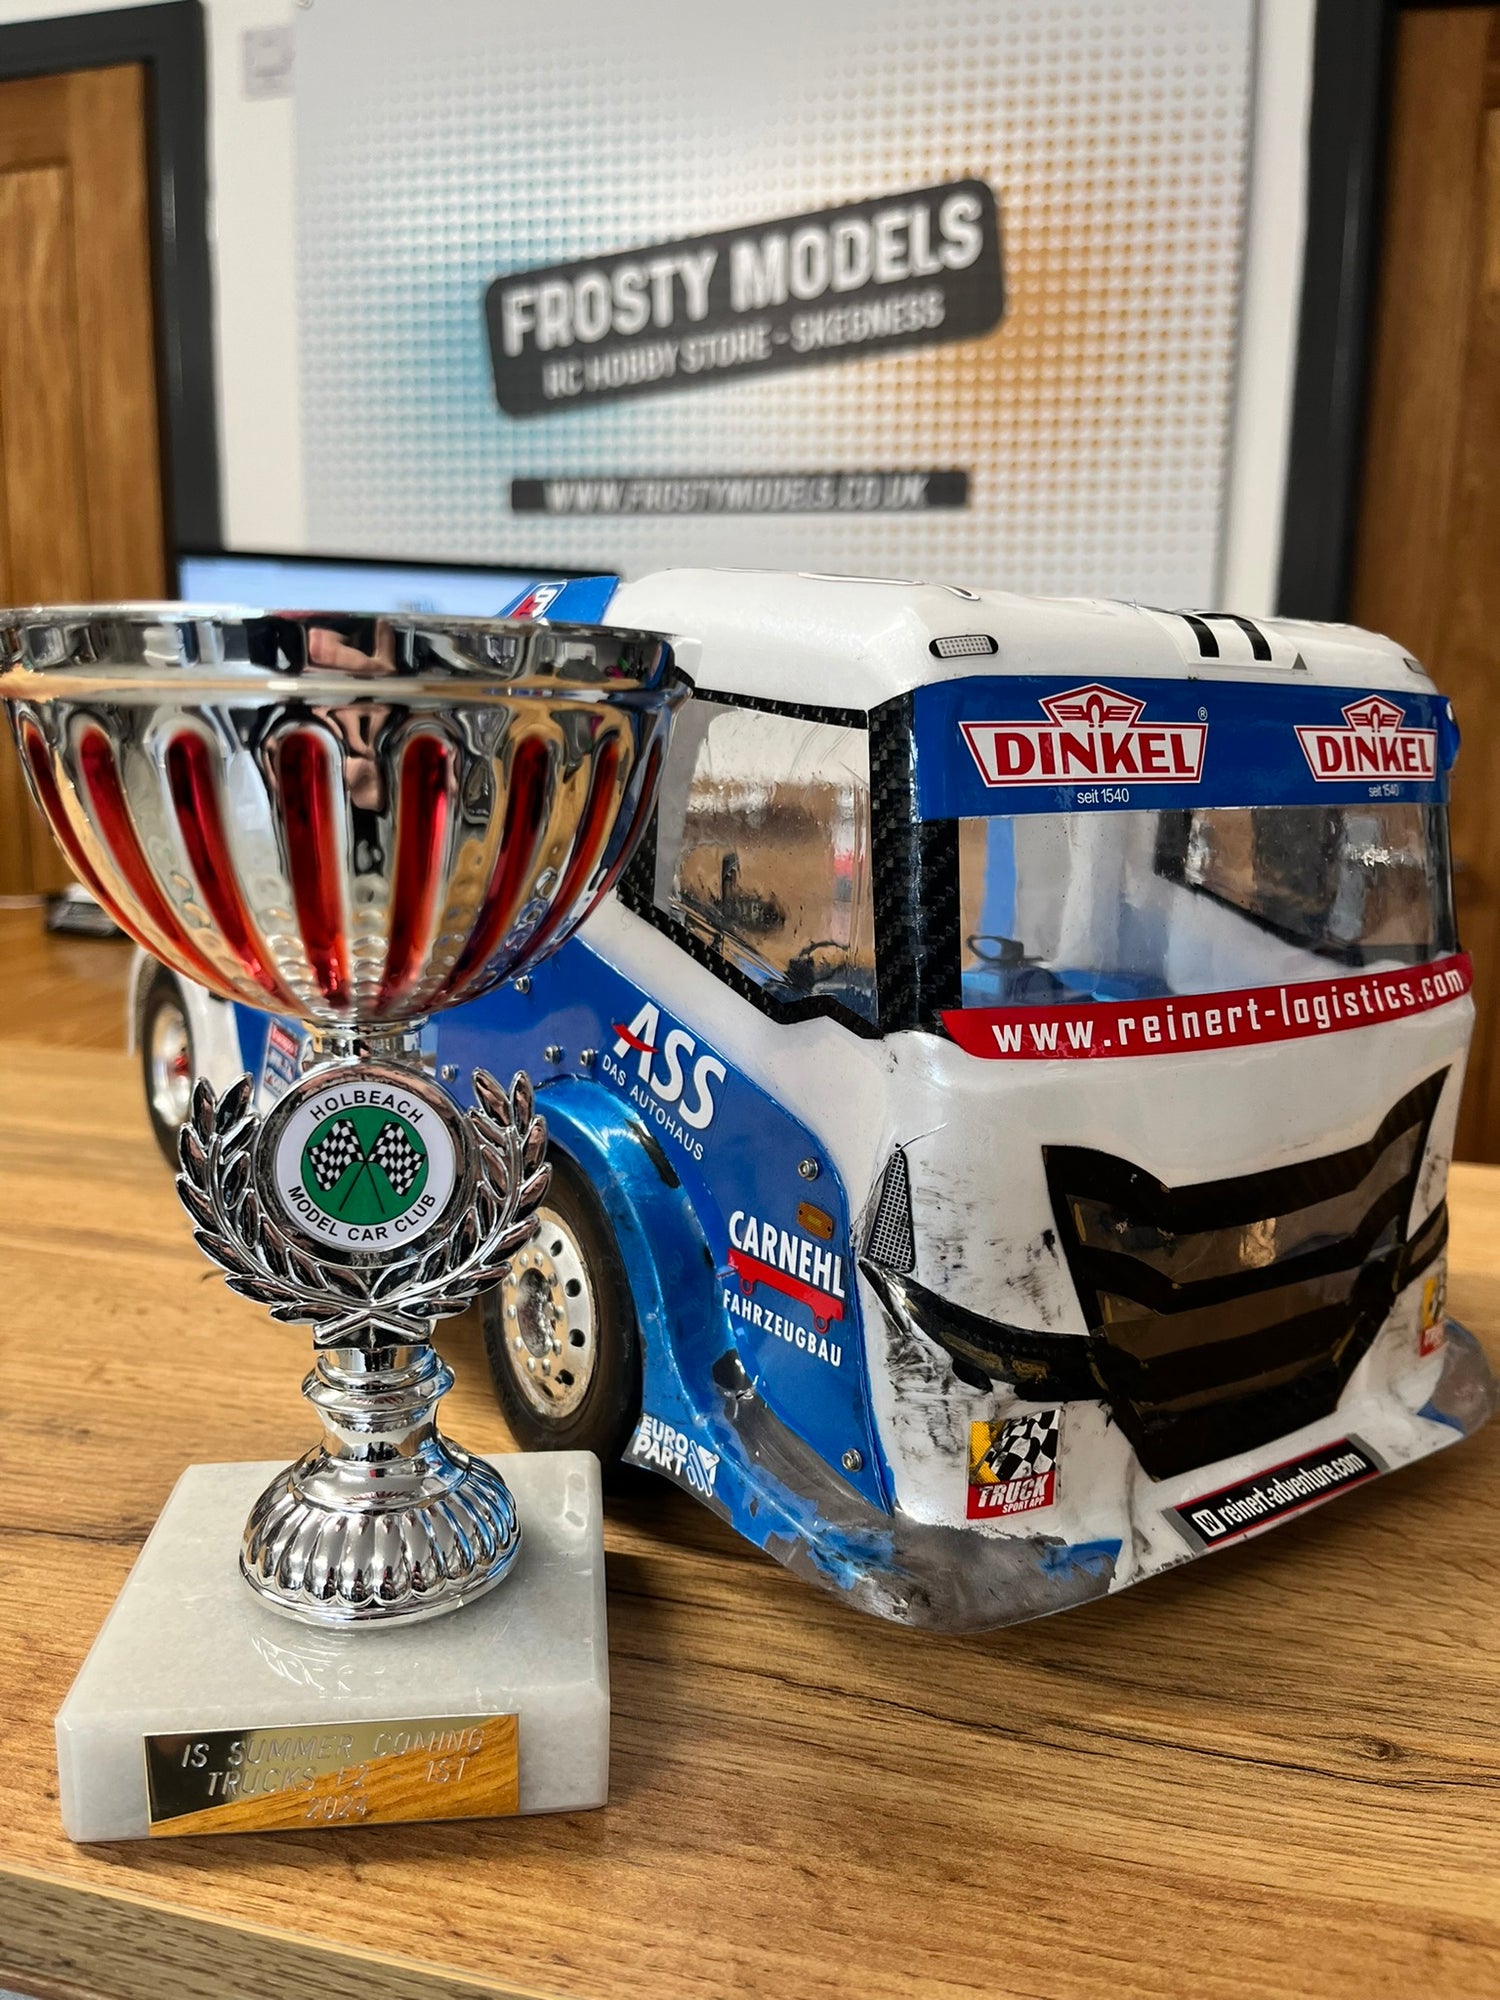
Frosty Models - UK's #1 Euro Truck Stop
Here you will see guidance for the Tamiya TT01E Euro Truck:
- Detailed discounted parts available
- Rules chart on all local clubs
- Guides on 'how to' build a race truck
- Tips for competing
- Maintenance guides
- Links for all parts
- Resource links
- Videos
TT01E Euro Truck Racing Rules - Lincolnshire !
Please see key and or email for additional information.
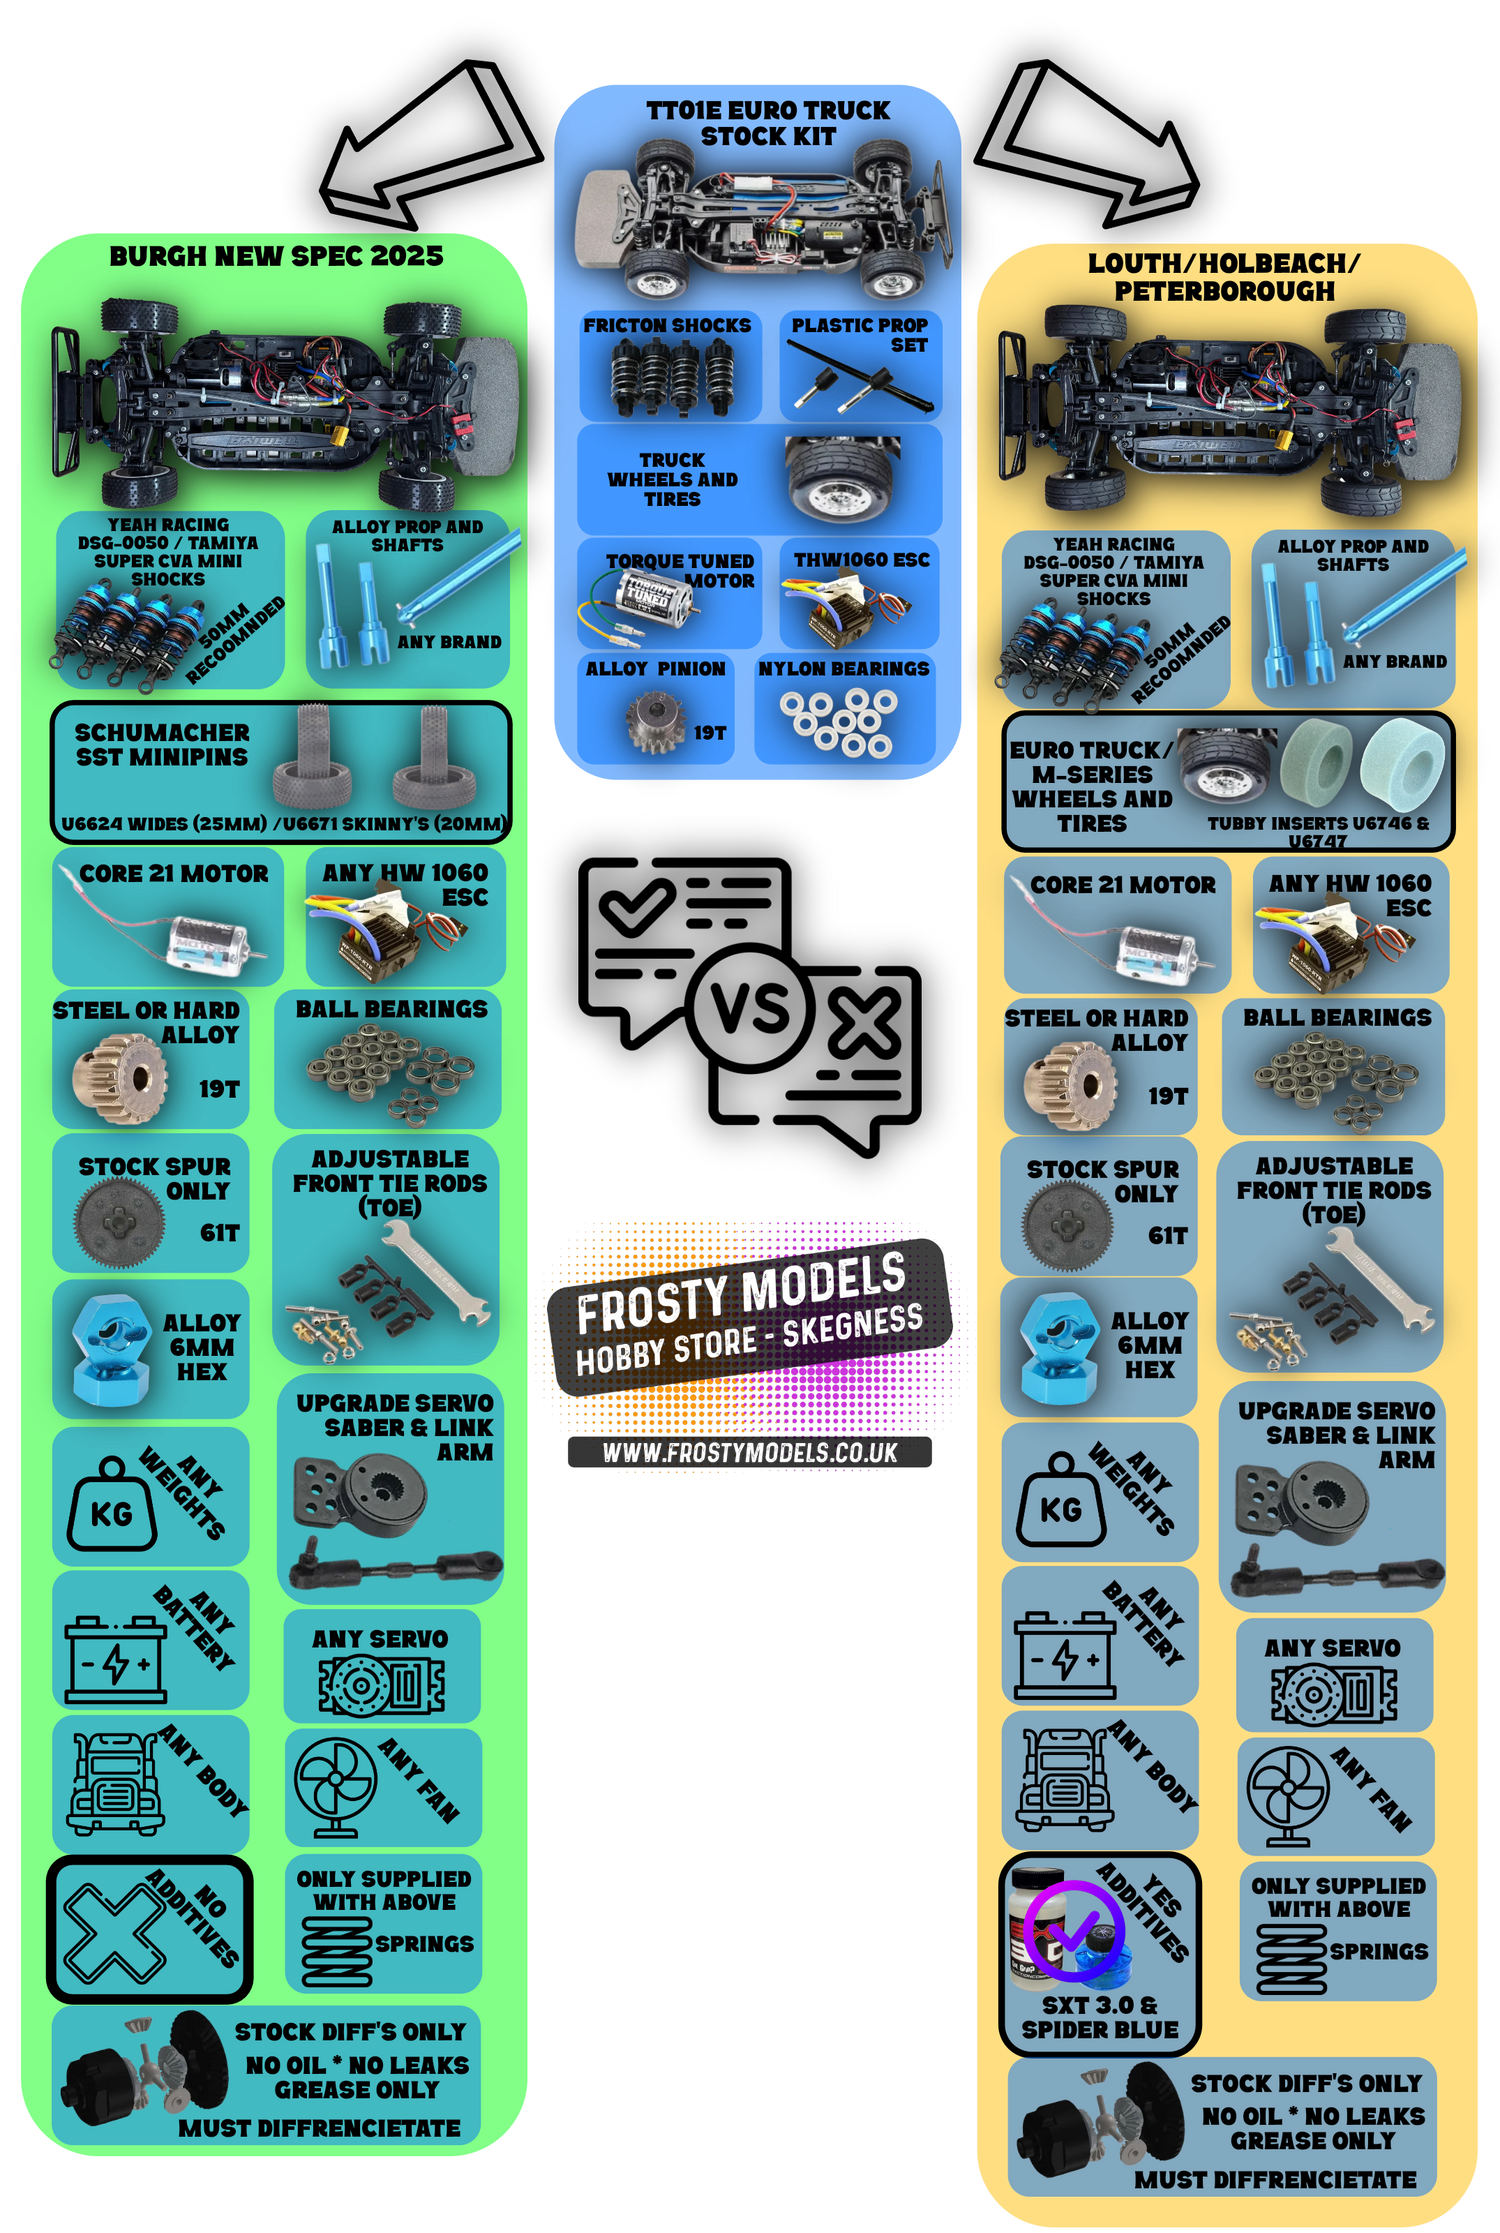
TT01E EURO TRUCK KITS, UPGRADES & TUNING
-

1/14 Euro Truck Kits
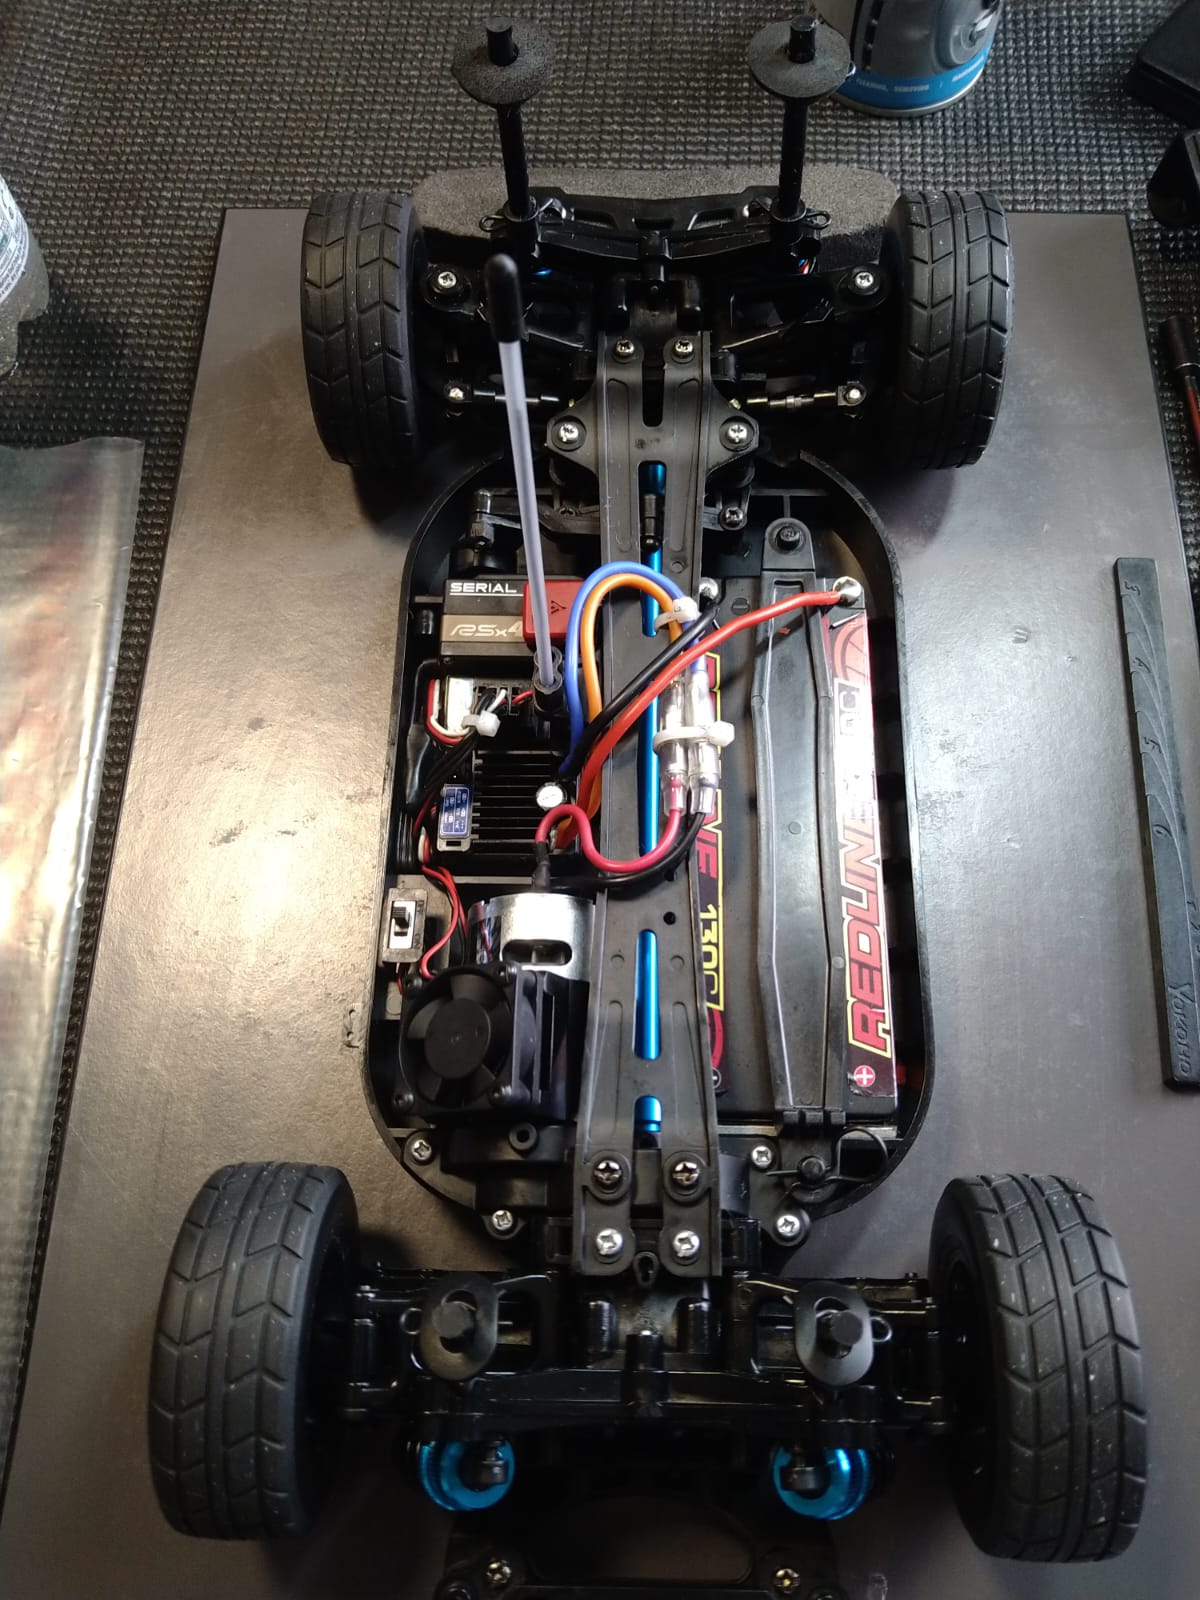
Based on the TT01E Tamiya Chassis


YEAH RACING DSG 50mm Shock Set
YEAH RACING - 50mm Damper Set 4pcs (for TT01E Euro Truck) DSG-0050BU
These are the best tried and tested shock/spring combo set to help prevent roll over and create a dampened cornering.
Limiting the shock travel further by inserting one of the supplied spare rubber o-ring into the chamber, keeps the TT01E low to the track surface, with a droop effect.
They are supplied kit form. Make sure to seek help on building shocks for the first time. Use around 350CST shock oil when building these.
The kits comes complete with 4 sets of springs.
We use the softest on the front (red) and the next hardness on the rear (yellow). If your truck is not rotating on the rear, go up a hardness.
We run these shocks on the lowest setting, giving us around a 5.5mm ride height all round.
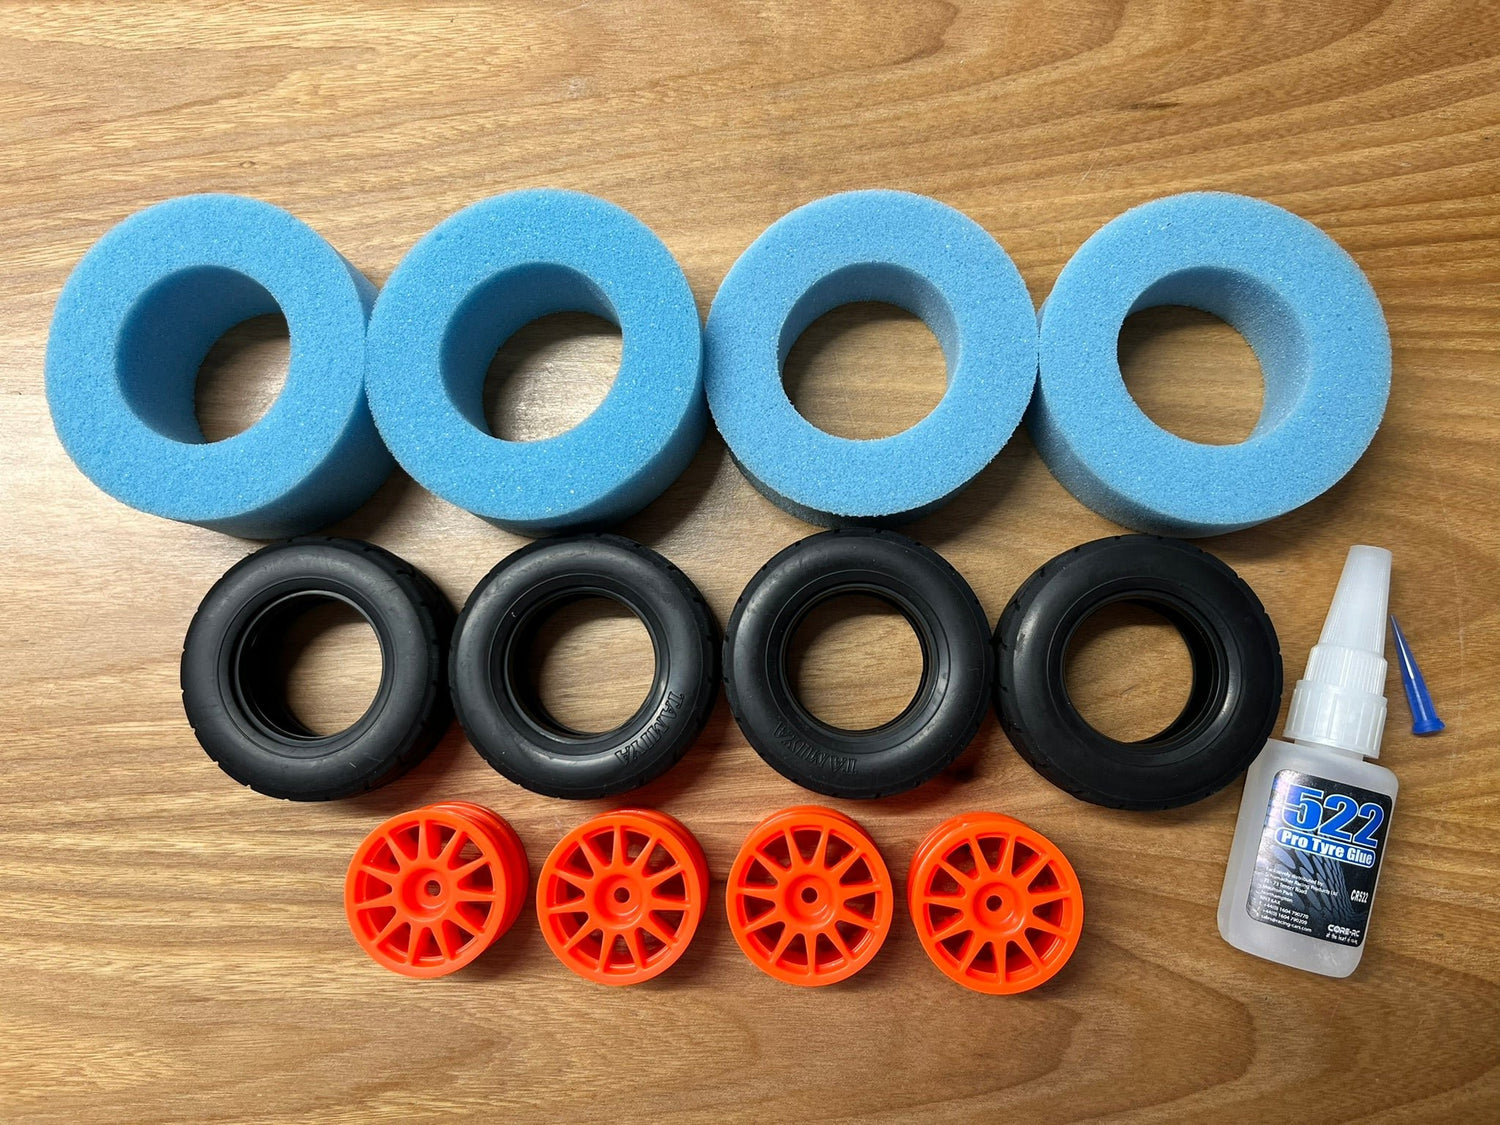
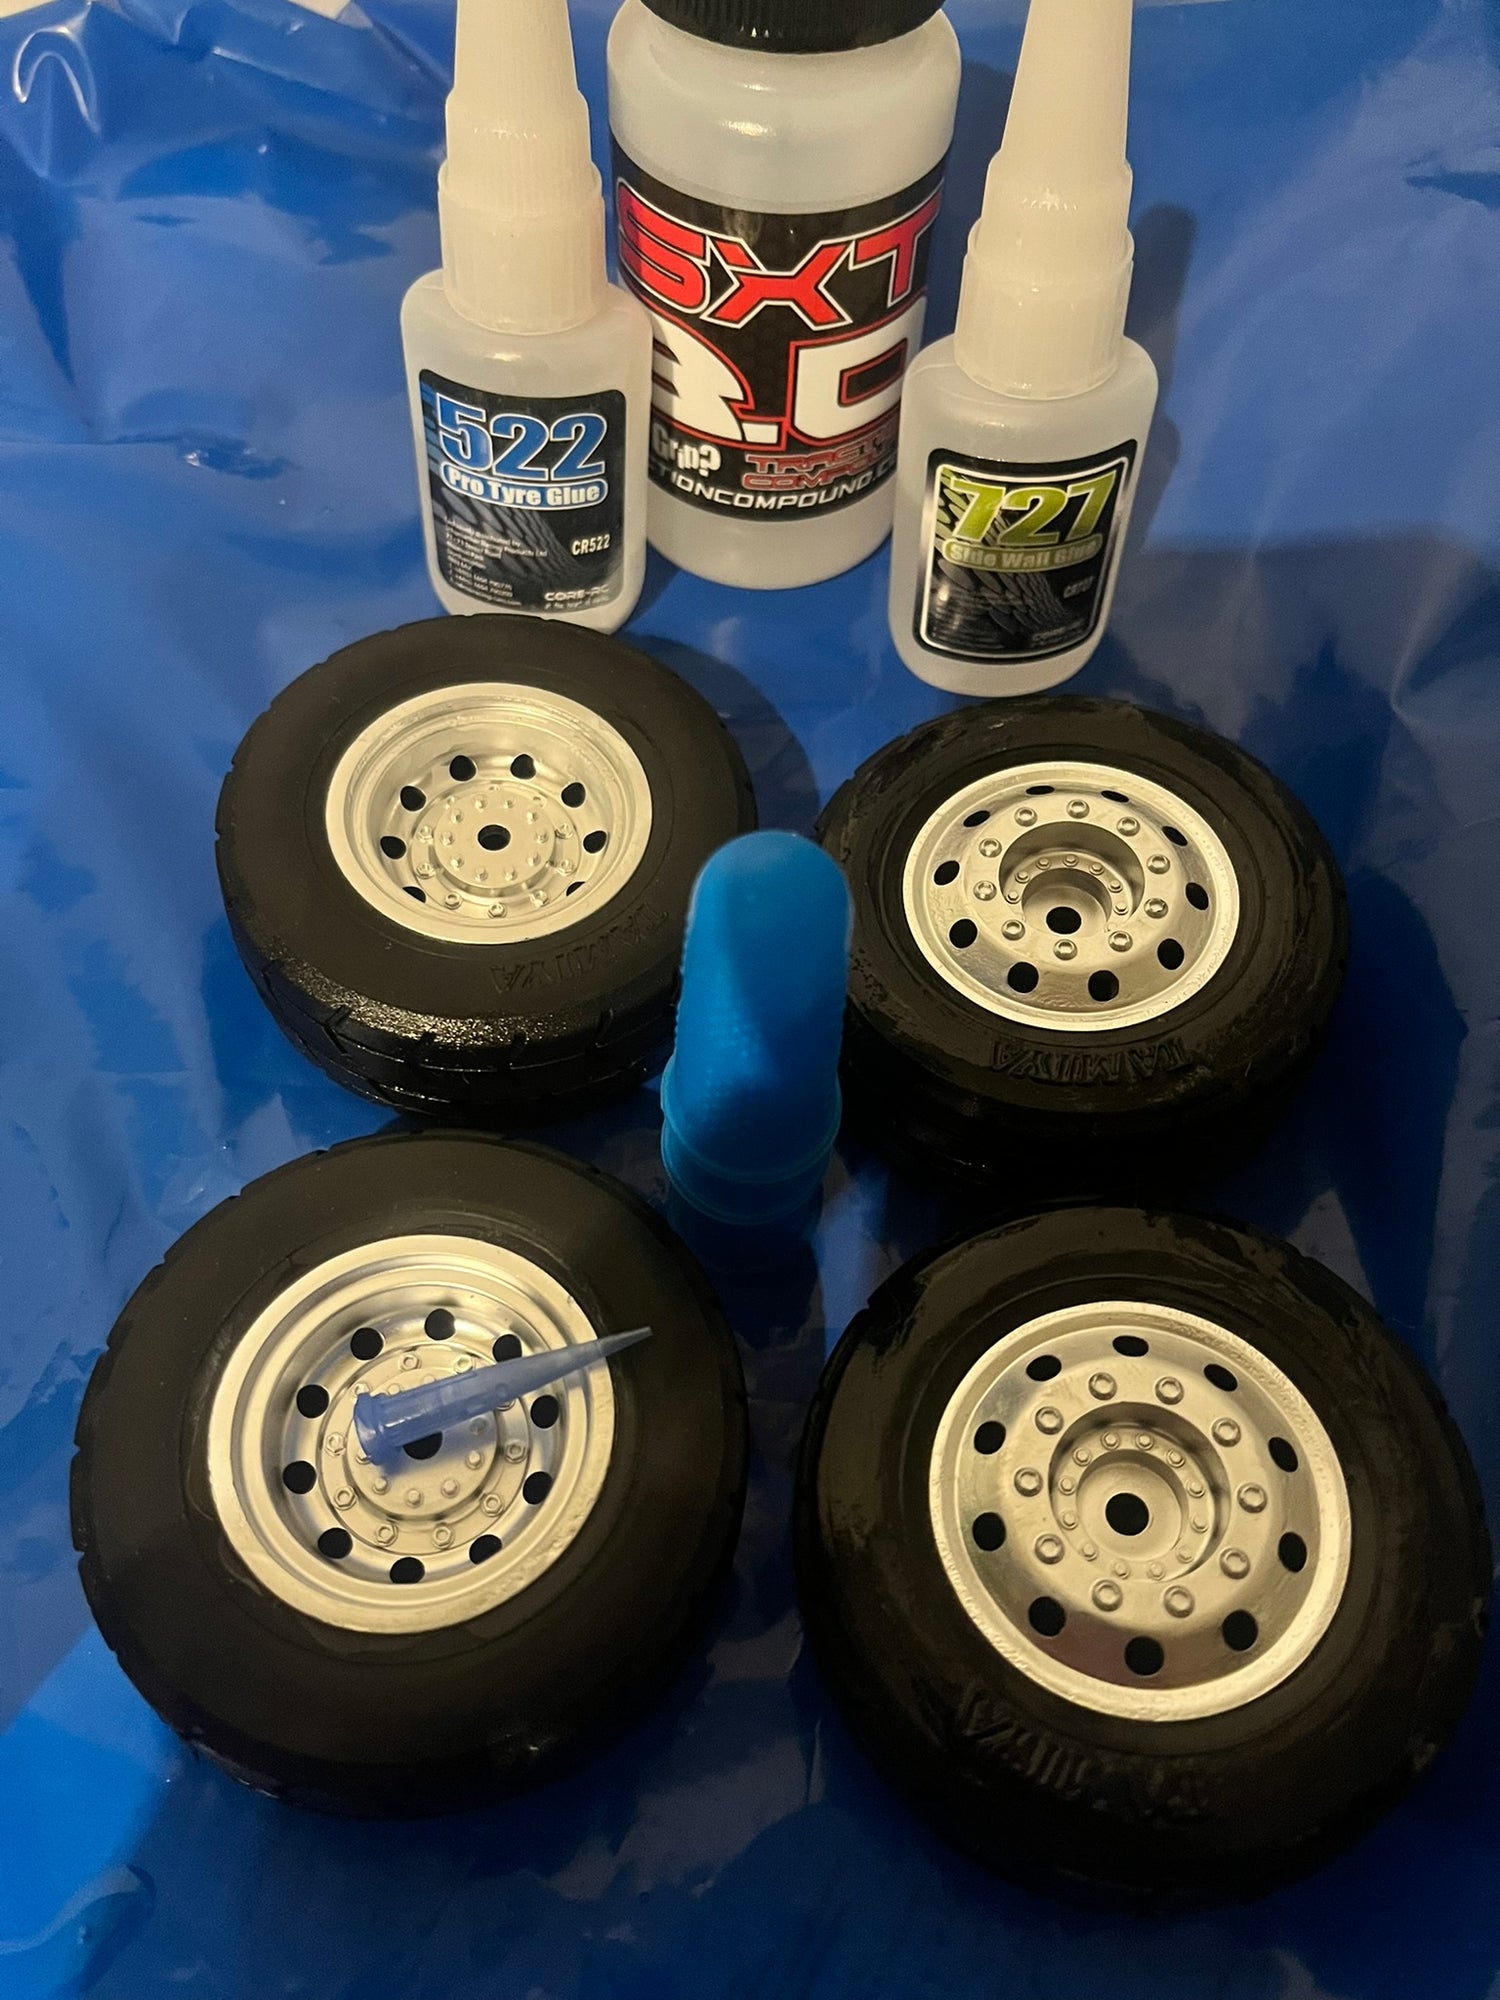
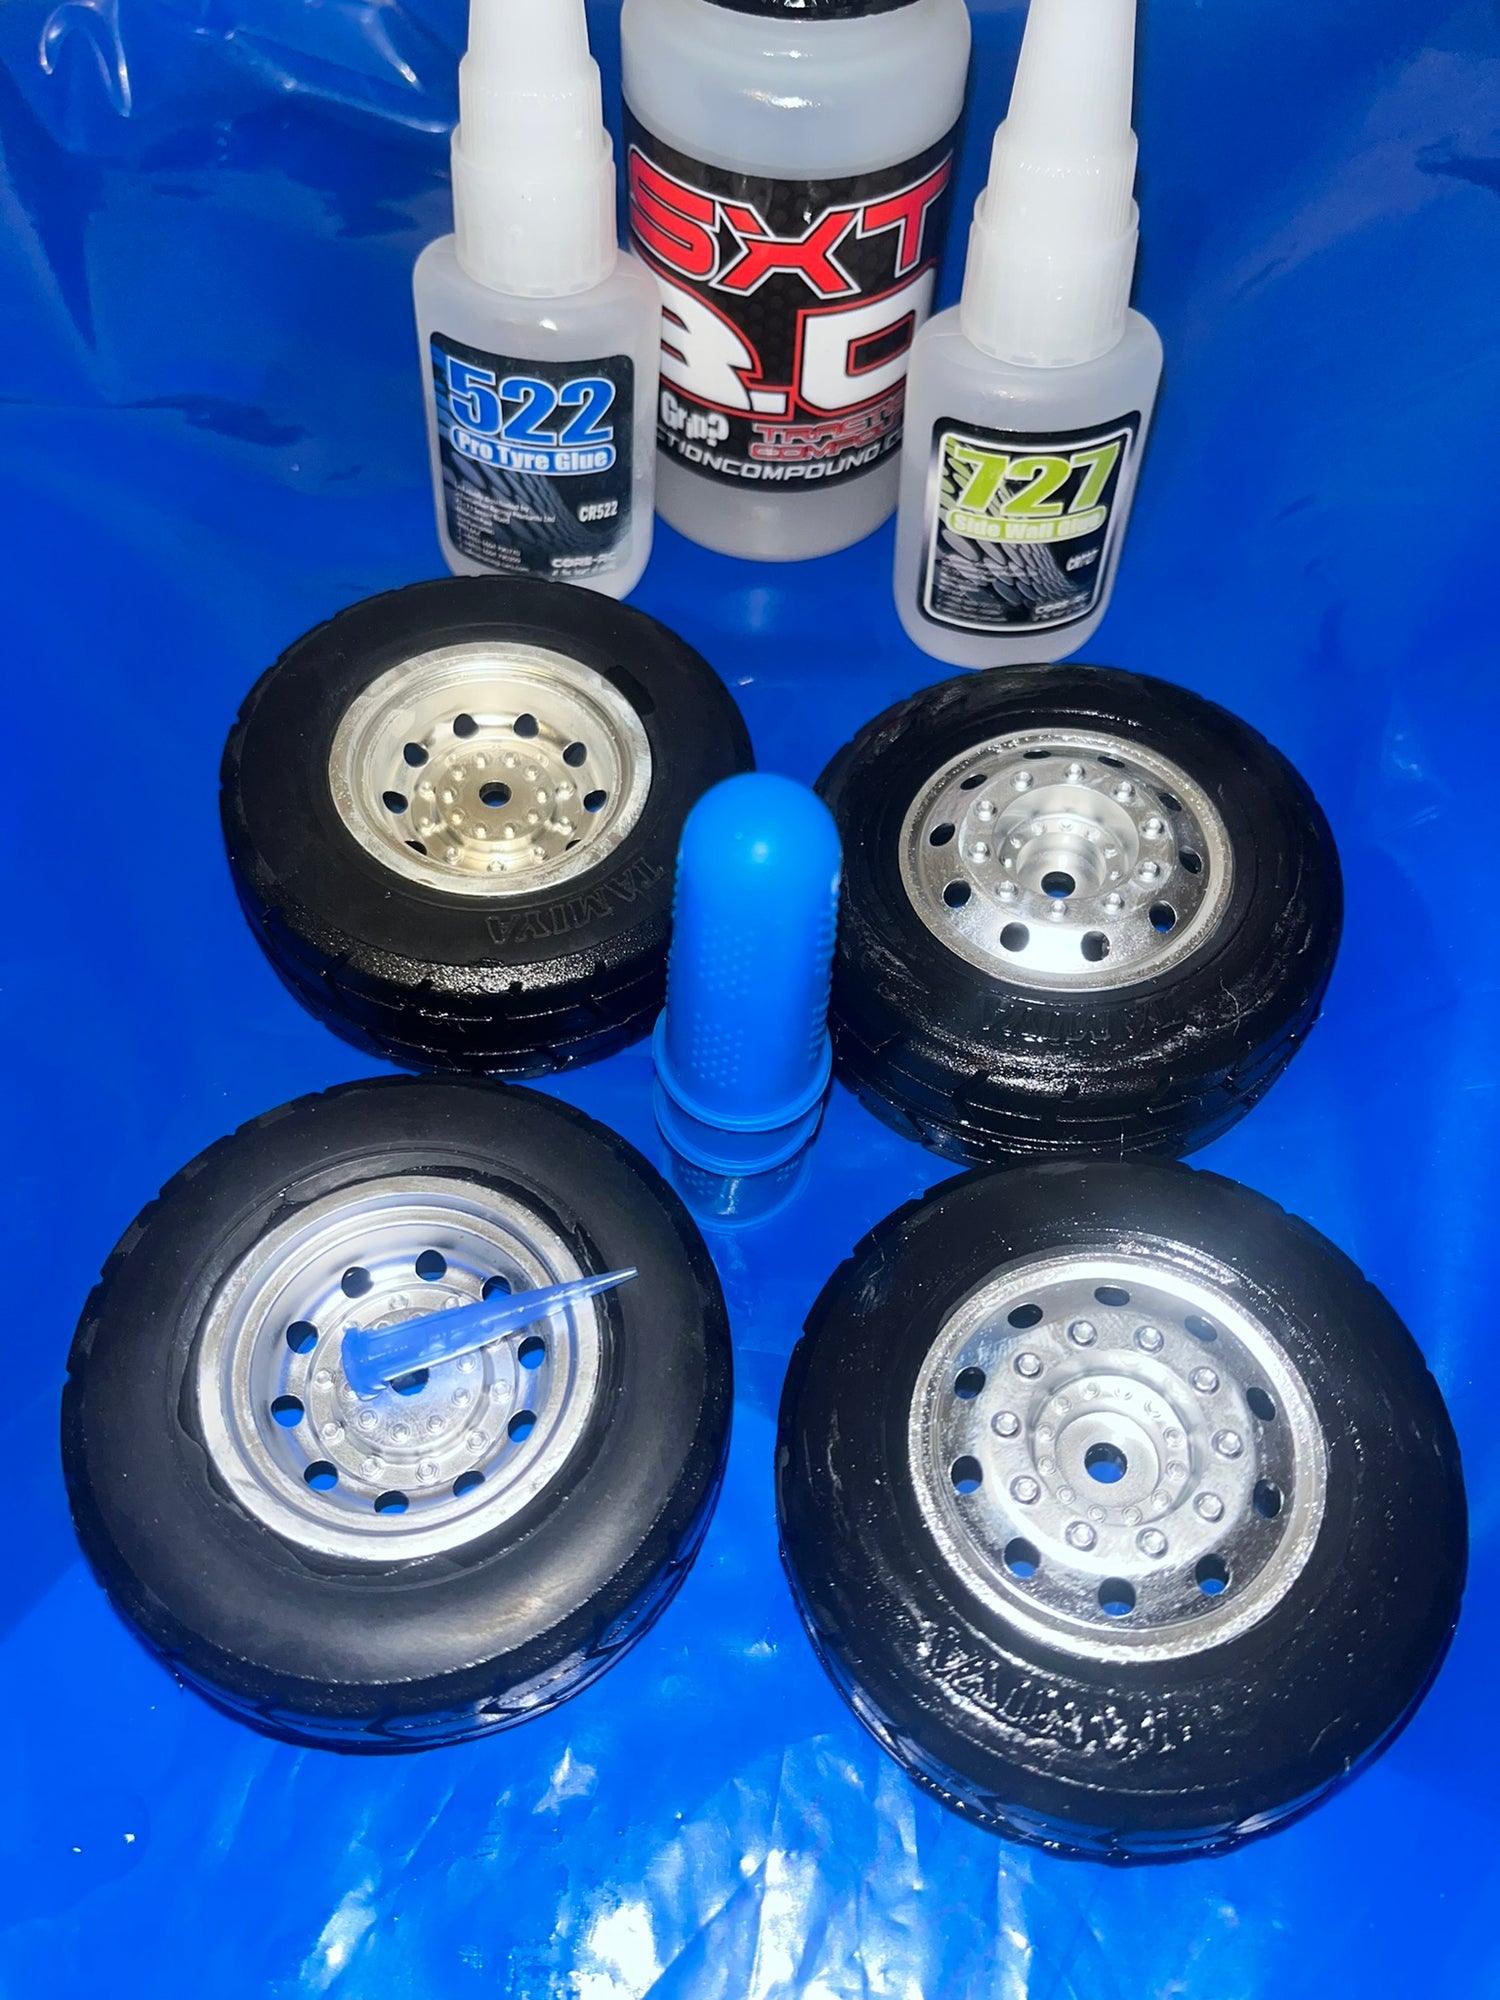
Wheels, Tyres, Inserts and Glue
Here is the list of the parts to buy:
Any Tamiya Euro Truck or M-Chassis Wheels:
-522 Rubber Pro Tyre Glue
-Tamiya Euro Truck Tyres
-Schumacher Tubby Inserts
Not forgetting the Sidewall glue and rubber applicator.
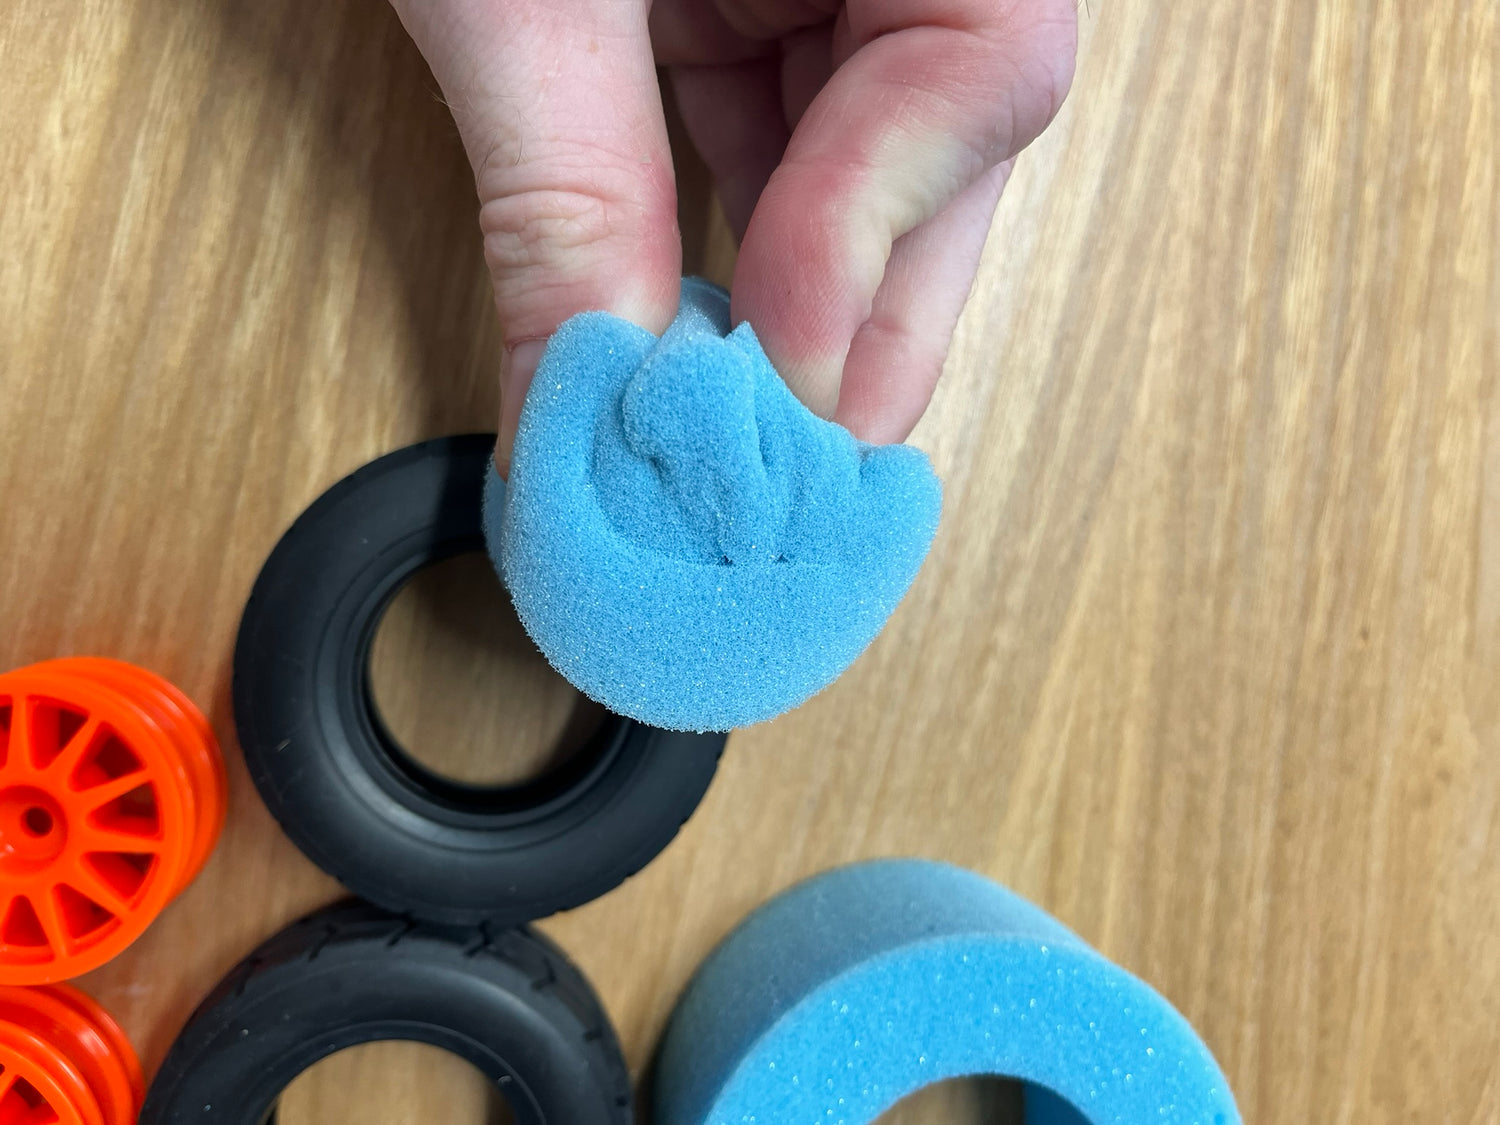
Inserts
We use a Tubby Insert - in fact two types.
(TUBBY MEDIUM) 2pcs (USE FRONT) - U6747TT01E
(TUBBY MEDIUM) 2pcs (USE REAR) - U6746TT01E
Make sure to tightly pack the inserts before inserting them - they need to be evenly spread to prevent hard patches.
Fold into a 'C' Shape, and then fold once more. Keep held tight on insertion. (Always making note which tyres are front and rear - Harder front)
Caption
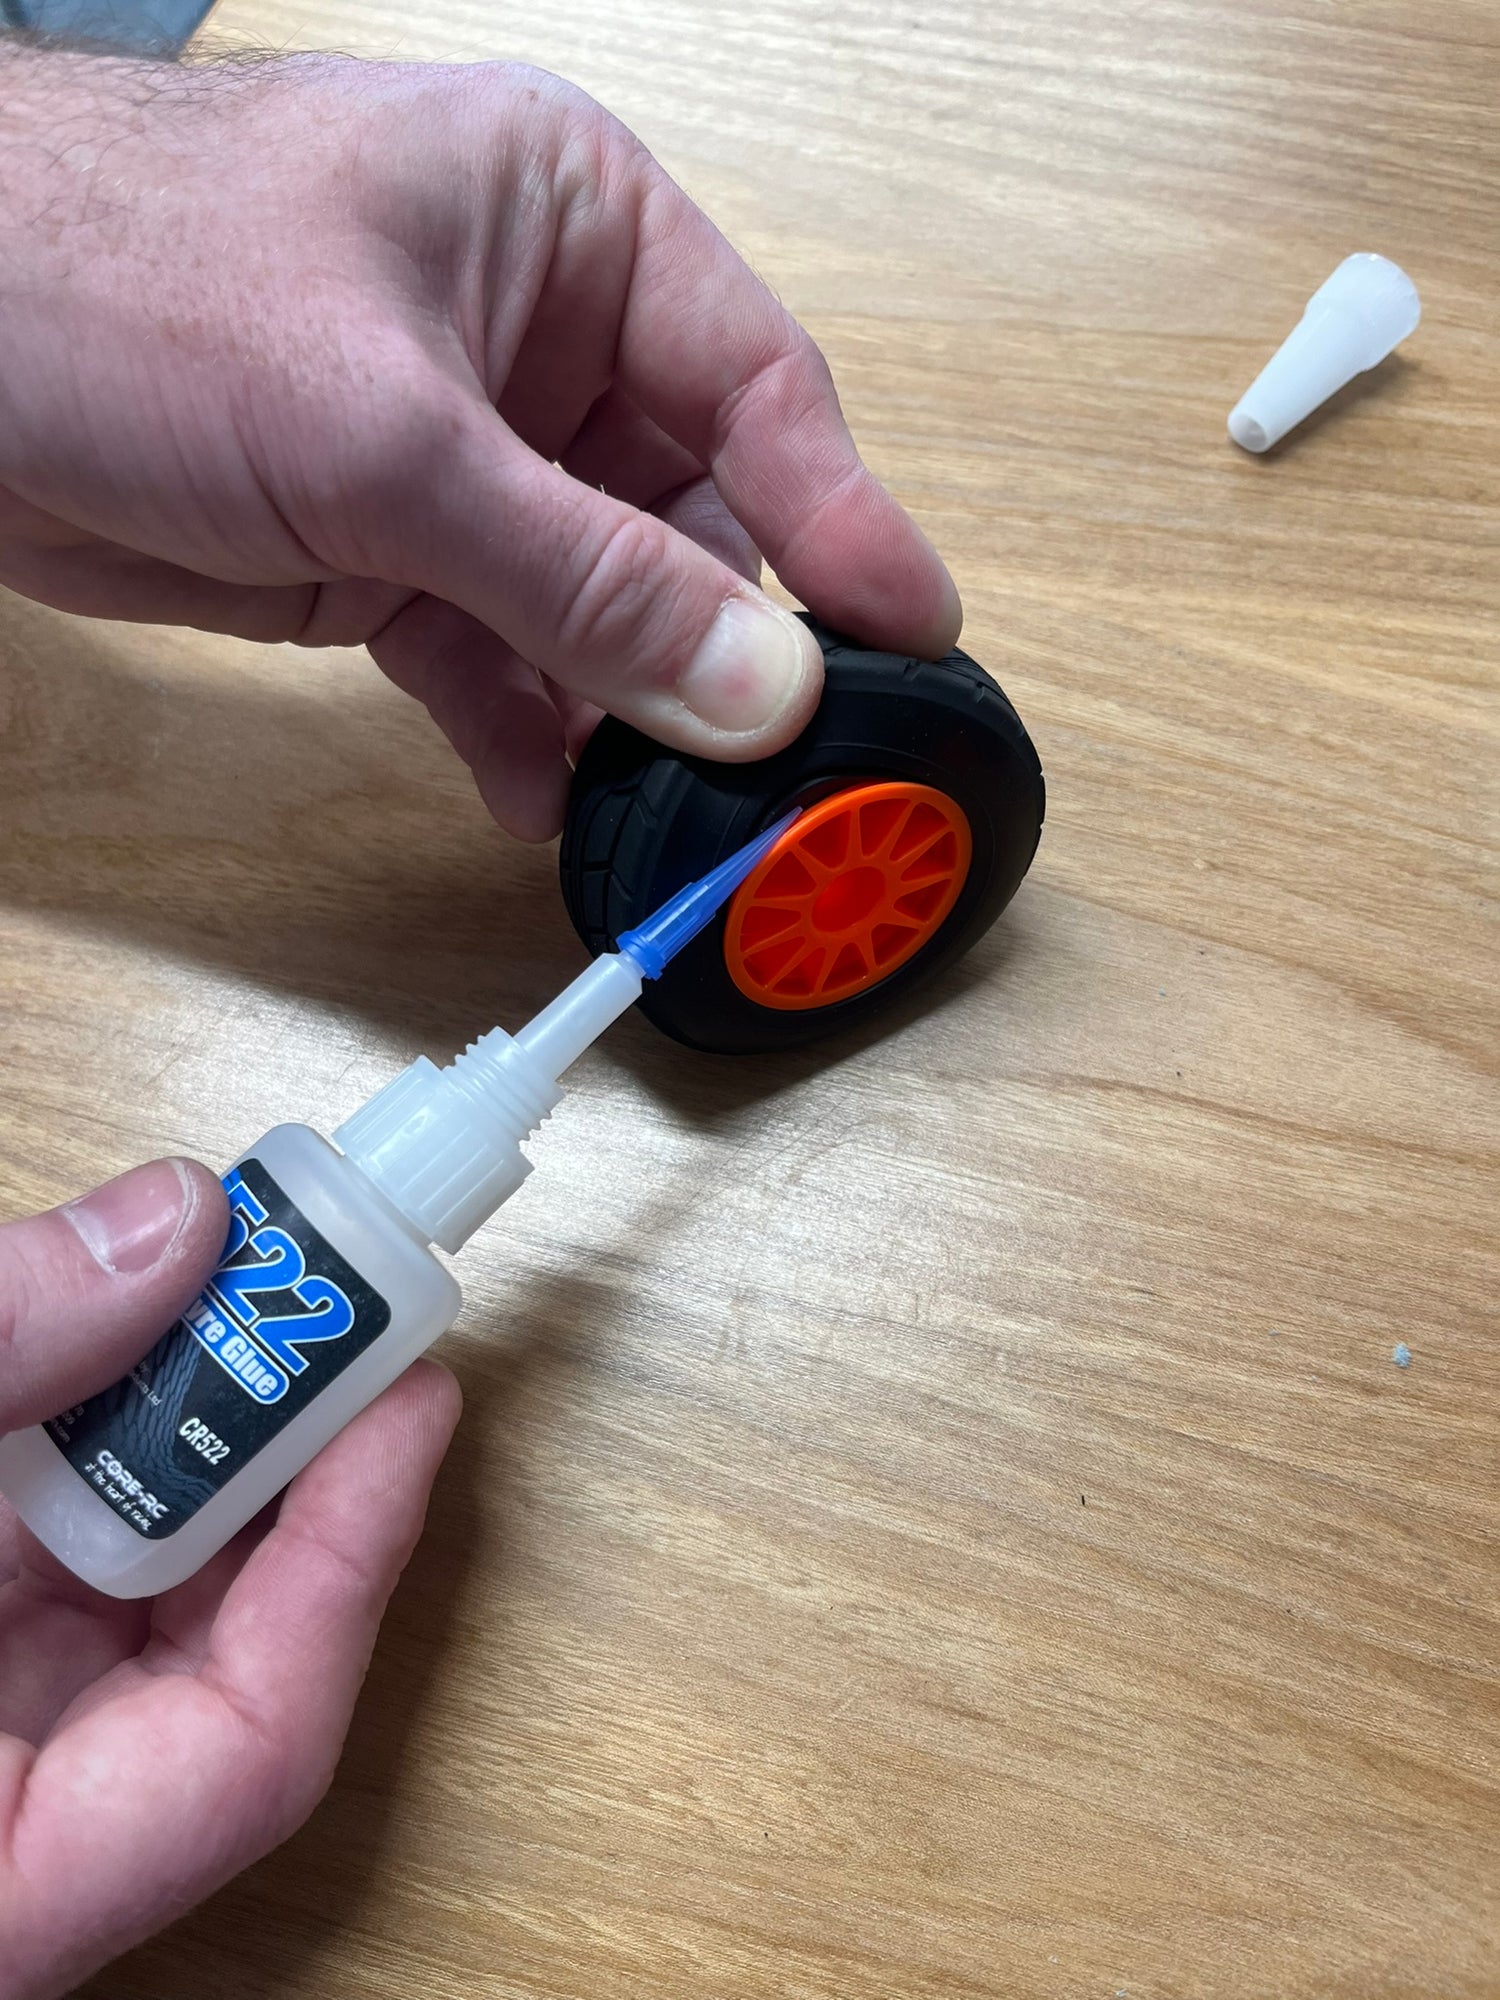
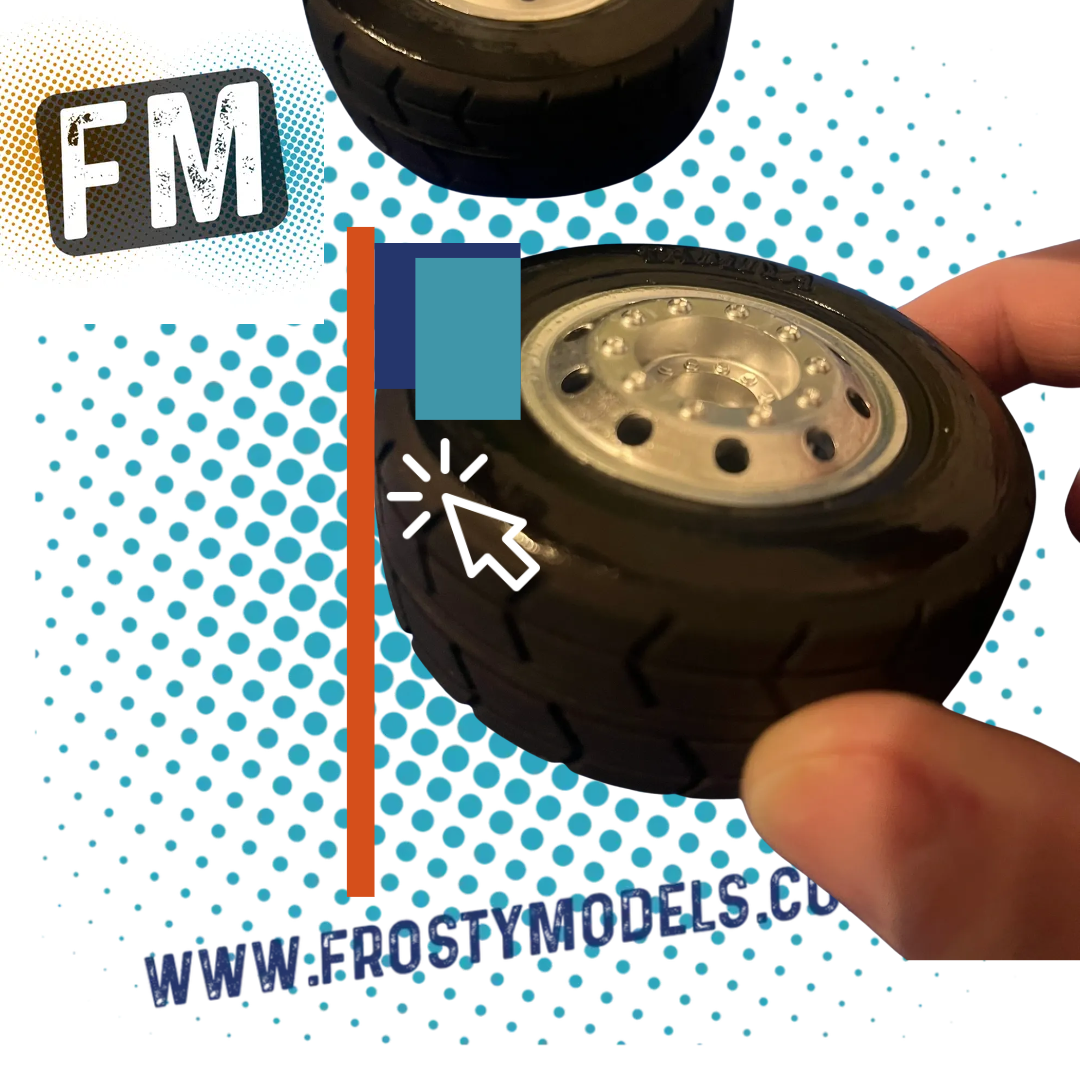
Gluing the Tyres
Making sure you have clearly marked all 4 wheels left to right, back to front. Also make note to have the Tamiya logo facing 'inwards' (this prevents glue build up on the letters on next step).
Our 522 super thin tyre glue sets fast! With the supplied nozzle, simply only pull back the top bead of the tyre - showing the rims tyre contact point. Only drip 1 or 2 tiny drops on this area and then pull back all of the tyre wall. The glue is so thin, it will seep 360degres of the wheel. Allow to set and repeat the other side. Remember! Ting drop! you may not see the glue come out at all.
Tyre wall preparation
Gluing the tyre wall - 'Slip Effect - Anti Grip Roll'
FRONT ONLY!!!!
As you can see here- we noticed a build up of glue on the 'Tamiya' lettering. In future it is advised to flip the tyres when assembling.
Tyre Wall Glue dries clear and flexible

Application of Tyre Wall Glue
Once again, using the supplied glue nozzle, drip a thin line all the wall around the face of the tyre wall and rub in with the glue applicator (sold separate).
Caption
Anti Grip Roll
Now you have filled the tyres with thick hard foams (reducing tyre cornering compression) and you have glued the tyres to the rim (preventing tyre loss), the next stage you completed was the first layer of glue on the tyre sidewall.
1 - Glued tyre sidewall you have done two things here
- A. Made the front tyre wall harder.
-B. Made the tyre face less 'Grippy' when in contact with the track barrier or other trucks)
2 - See Pic - You will notice there is a part where the sidewall ends and the tread starts on the 'face' of where the tyre meets the ground. In this gap lays the 'Grip roll' issue.
A- Carefully apply a second layer of glue across the entire face of the tyre sidewall and slowly smoothen this layer nearly up to the tread (NOT ON THE TREAD). This glue does not set straight away, so make sure its a very thin layer. Repeat to reduce grip roll further.
Leave to completely dry! *Front outside tyres only for this process*
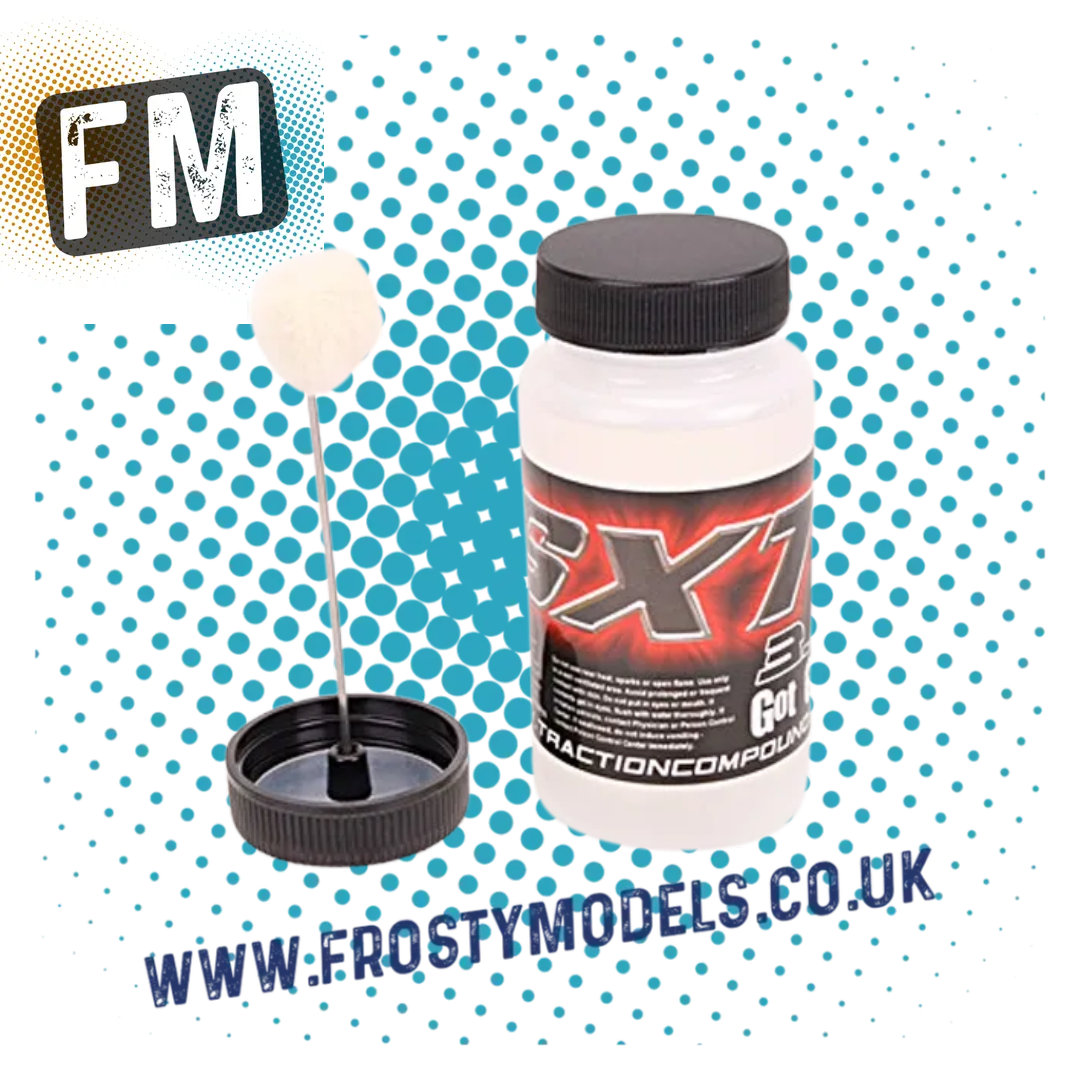
Tyre Additive
We have found the best for the job is the SXT Traction Compound.
Applying a little bit several mins before the race. Giving grip during the race, but also allowing the tyres to no retain too much.
*You can always add grip - you can not take it away without a semi-permanent change*
Caption
Race Ready
You are now race ready.
Tips
1. Give new tyres the chance to bed in.
2. Understeer - add additive
3. Oversteer - Do not use additive next round. Or only apply to the inside of the tread (leaving half not covered in more grippy stuff)
4. Poor rear rotation - stiffen rear end
5. Front droops on breaking and leans whilst under grip (no grip roll) stiffen front springs
6. Under of chassis is showing rubber marks on outside edge - raise ride height by turning the shock collars towards 1mm at a time. Good measure is 5.5mm from ground all round.
7. Car does not like S bends (understeers - try some of the above, but harden shock springs if scrubbing off time here).
8. Have grip but poor steering angle (does not make a turn under power or off power) increase EPA for direction or turn on handset and make sure dual rate is on max. You should always have 100% DR and then brings in the EPA till the steering 'Max's out'. You can then use the DR to lesson the amount of left & right steering angle when needed.
Caption
The winning source
Truck Setup:
Presuming you have the following already:
-Fast Servo around 0.10sec's at 6V
-High Torque Servo Saver
-Hardened Pinion
-'Bedded in Motor' (read other guide)
-7.4V or 7.6V Race Lipo (do not overtighten battery to tray - must float)
-No added weight
-Correctly fitted body and rear bumper (no spoiler needed)
-Adjustable Steering Linkage Arms (use outer most hole on Knuckles for more Ackermann angle)
You should now be ready to compete!
Preparing To Race
Setup Mentions:
1 - Ride Height Guide (shocks wound all the way to the top - lowest - with 2mm O-ring inserted into shock) ride height ground ground to chassis will be around 5.5mm
2 - Front Toe: Start with 1.5Deg Toe Out - so wheels are points outwards on the front. It has been known to reduce this to gain better straight lines or even combat fast S bends.
3 - Suspension mount holes (inner - lower) upper (outer) start with in the lower hole. Moving the front more upright if you wish to create more direct initial steering response (increased unwanted grip on fast turns).
4. Body height - after racing a few laps, ensure the tyres are not making contact with any point of the body. Contact will cause the tyres to grip the body and cause a 'braking' effect only of that loaded corner and can result in more grip roll.
5. Handset setup
A. with all above said, this is presuming you have all EPA's set to mx throttle and brake. And Steering set to max EPA before the steering knuckles max out. You can now lower your EPA to the point that allows you to turn, without spinning out.
B. Use steering and throttle curves to 'lesson' the initial throttle~brake and steering input. Giving the first input from your fingers a smoother feel, whilst still giving you max top end on demand when at full trigger angle. Lowering the curve will give a smoother line through the cornering, keeping the balance of the truck on all four wheels.
Smoothness wins in truck racing, and its the slowest 'looking' truck that is typically the fastest. The trucks have a max speed, so you need to keep the truck at that near top speed average the best you can. Slowing down too much for a corner, will lesson the speed you come out of the turn.
For more info from the Pro's see the link here to The RC RACER website.
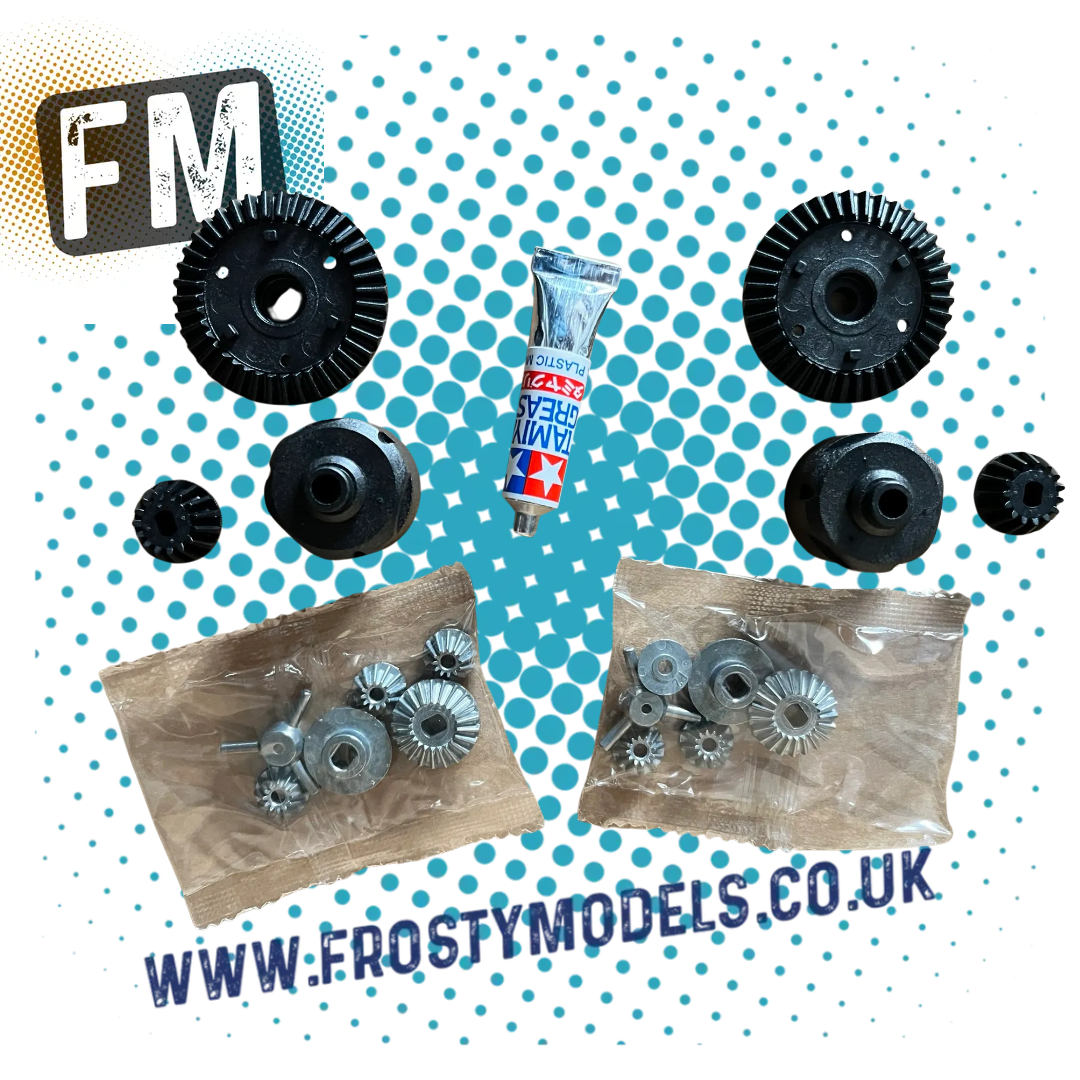
Differential Setup (Stick to kit setup first - change diff settings once you need to improve time ~ beyond skill)
Setting up a diff incorrectly at this point may result in poor effect changes to the advice mentioned above.
Building the 'stock' kit diffs simply just need a bit of their supplied Tamiya Grease for starting out.
Generally:
Slippery Surface - Use thicker front grease (some clubs allow 100,000CST Diff grease on the front - to act like a spool, but still allow differential effects - not allowed in most carpet tracks)
Carpet - All that is needed for carpet is for the diff to not 'spin up' the inside wheels when cornering under power. This can be obtained by simply using AW Anti Wear grease on the front diff gears. (this will need rebuilding periodically). The front diff should spin no more than 1 and a half turns with a flick of the tyre and the rear no more than 2 to 2 & 1/2. If your diff rotates for several seconds, its time for a rebuild. (If surface is not very grippy, combined with fast bends - go for a Heavy Grease Tamiya Anti Wear Front Diff - including AW on the back of bevel gears. Only a covering of all gears is required on front)
Tarmac - Unrevised at our clubs.
Any brand Anti wear grease is very 'tacky' and a high tac (sticks to the gears) without causing too much viscosity within the diffs. Tamiya has the best Results.
Note - these diffs DO NOT have seals, and any 'thin' grease/oil would run out and cause issues to cars tyres and damage track. Seek advice.
Motor 'Run in'
For this we advise to be shown in person - due to possibly electrical risks.
- Setup your power distributor / a 3V power source or your charge to DC Output 3v (MAX)
- Get some Deionised Water and pour into a deep dish. Mix in 1 drop of washing up liquid.
- Place the motor in the water connected to the power source and run for ten mins (in reverse) Positive will either be a the red motor wire or have a coloured dot marked on the motor.
Running the motor in reverse will add 'timing' to the brushes. And the water will help reduce heat whilst they bed in and reduce the com from shinning up.
These are what we say are 'marginal gains' and not something you do on your first motor when starting out. A new racer would notice no benifit - where as a good racer will notice the power delivery change and maybe even overtake others down the straight.
Warning - these motors do not last long - All brushed tin cans will eventually 'burn up' where the brushes deplete. A good ran motor will notice a sudden increase of power a meeting or so before the end of its life. And the end result will result in motor simply stopping dead.
We have several links on youtube. See this one for an idea.
Always learning
Even when you win a few races - there is always someone faster.
Changing tiny things and testing is key. Never change any of the two things together and remember grip 'scubs' off when you back off additive, and sometimes its a gamble to use again further into the heats - as grip can improve on the surface.
Always remember these need maintenance to keep competitive.
Maintenance
1. Regularly strip out all the drivetrain and bearings, clear and relube.
2. Diffs needs cleaning and rebuilding as the metal 'pastes' into the oil and turns it into grinding paste.
3. Poor servo saver can result in poor performance, even in straight lines. Check this is cantering.
4. Geometry, check ride height and all tie rods as these can move under impact.
5. Shocks may leak or get air in them. They may need rebuilding if bounce back when no spring fitted, or you can hear air.
6. Suspension arms and ball pivots - regularly remove servo linkage and shocks to make sure all the suspension and steering components are moving freely. Greasing of all moving points is key here, from point of building through its live.
7. Spares, you will always be good to Keep Tamiya A - Parts. Giving you near enough one side (of either side) on hubs and shock/gearbox issues. Also keep a spare motor, as they can last 4 to 12 weeks of pure fast racing.
8. It is good practice to rotate the tyres left to right to gain even tyre where. Having a spare set is good, as they can be short in supply at times. The tyres can be ran till they bear through to the insert. And only seem to ever gain grip as they turn from treaded tyres to slicks.
12 Week Rule of Thumb
If* Help
Losing Grip: Use Additive
Grip Rolling: Re-apply Sidewall Glue up onto tread by 1mm (increase if needed)
Chassis Roll: Consider the tyres expired >
Tyre Expired?: Using additive, can 'balloon' the tyres. See Photo & Next Post
Noise from gearbox: Consider upgrading to Steel or Hardened Pinion & Replace Spur
Grease: After 12 weeks of constant thrashing, all the bearings and Diff's will require a rebuild
Losing Speed: Replace motor if brushes are near limit - Reclean using bathing method.
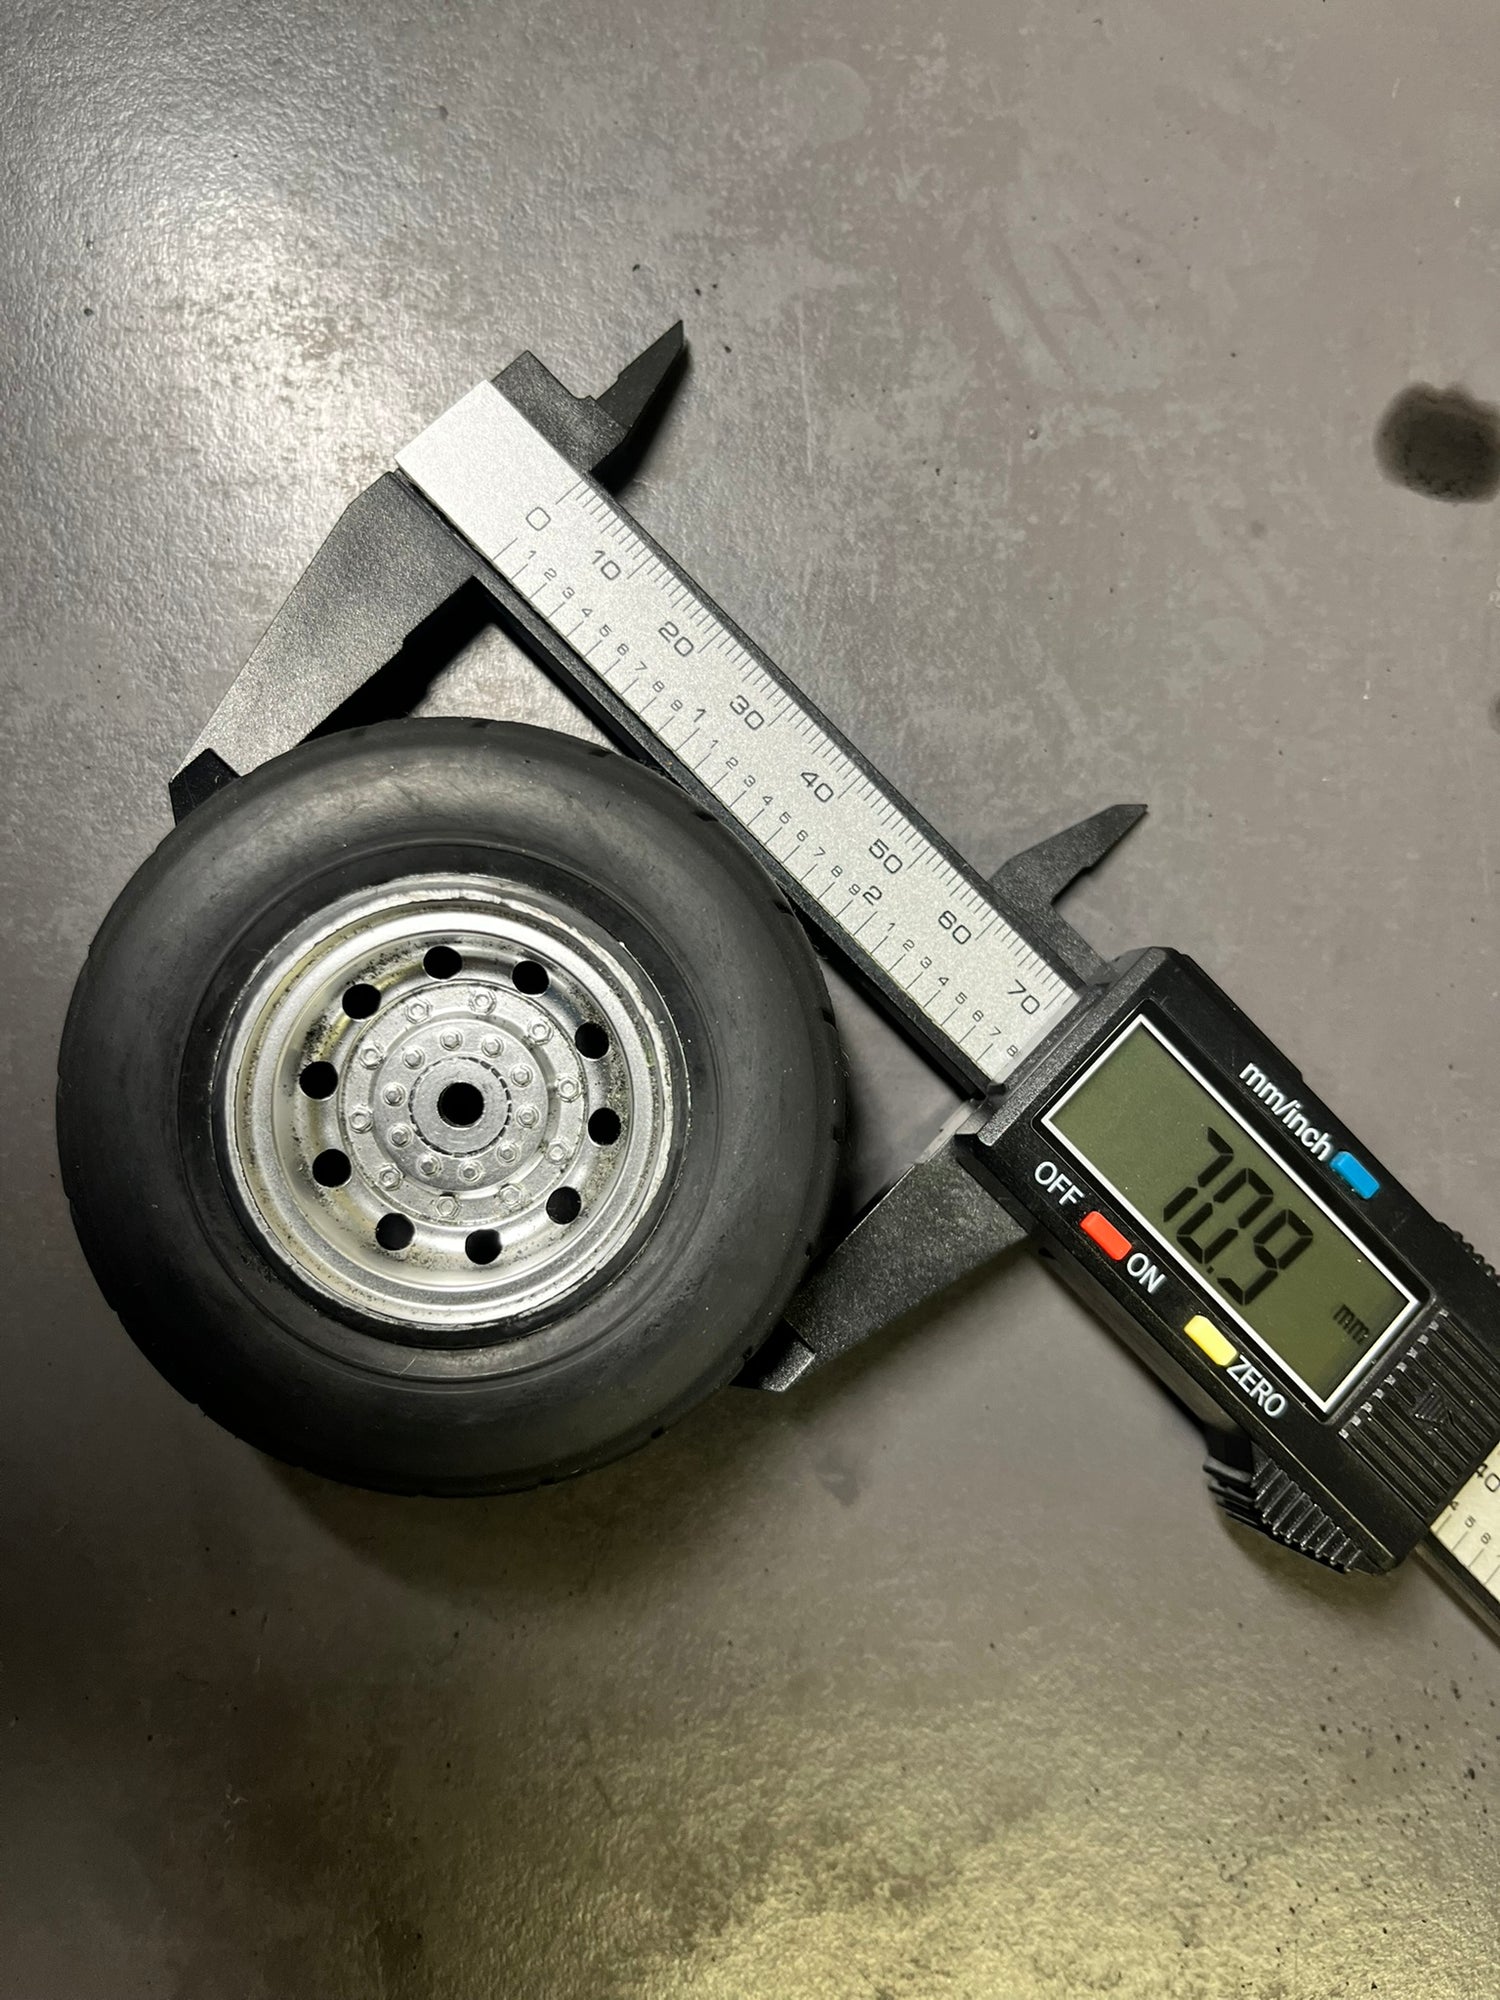
Photo shown is a nearly new Tyre being 71mm (when new and treaded) to 73.6mm when swollen.
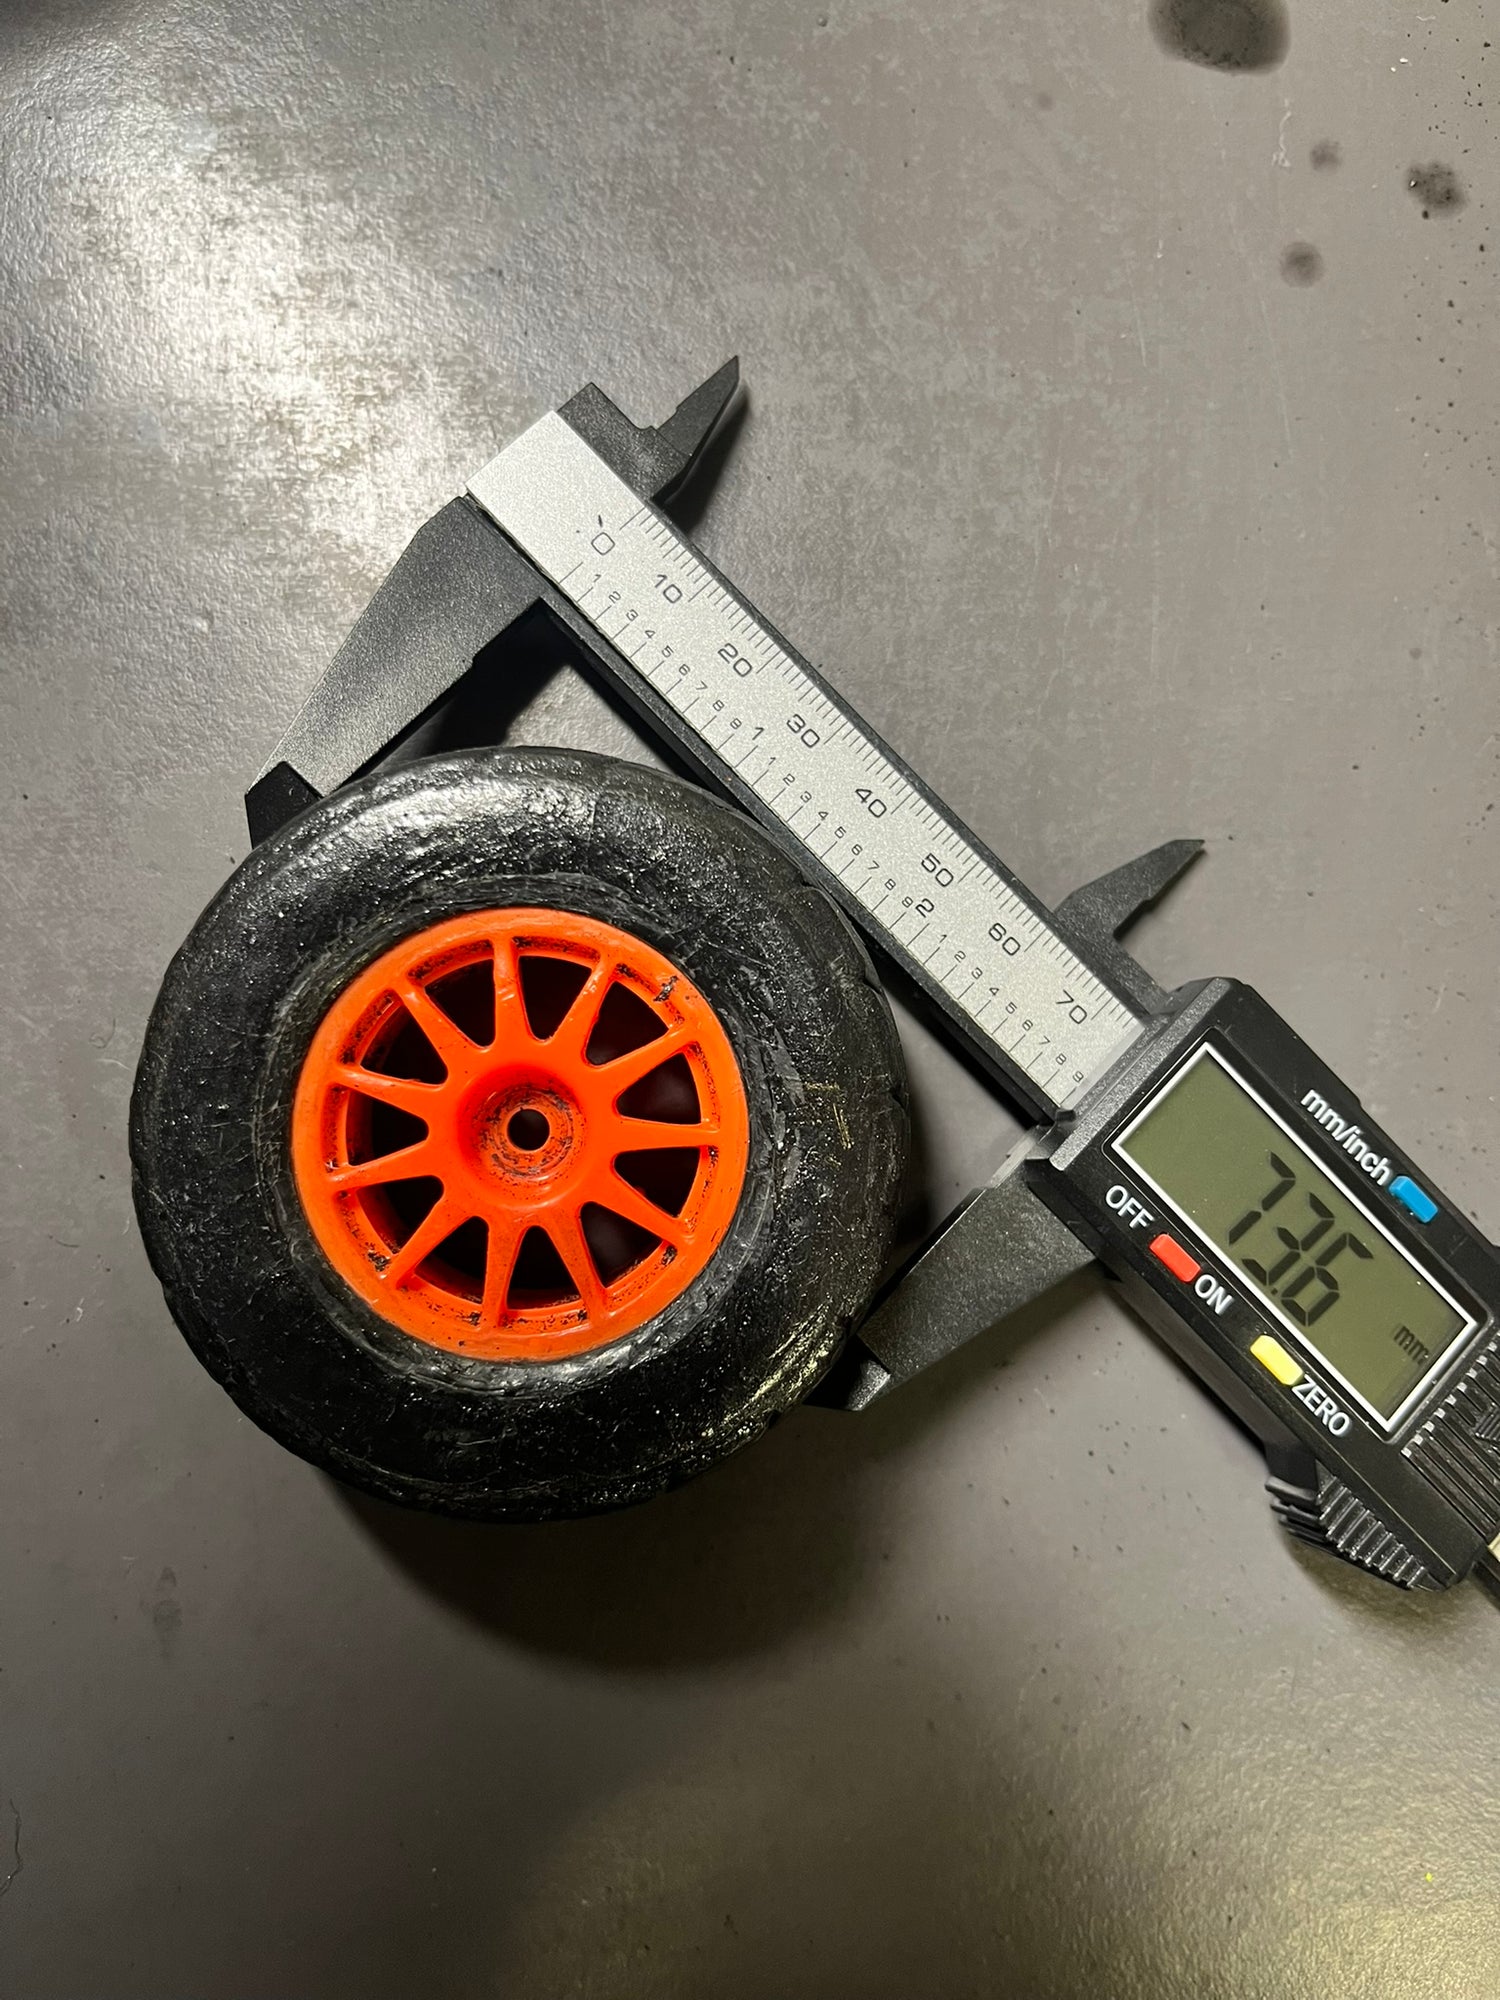
Tyre Swell
Here you can see the Tyre at its swollen state. Above showing the new tyre- showing the effects of 12 weeks of additive use. Time to replace!
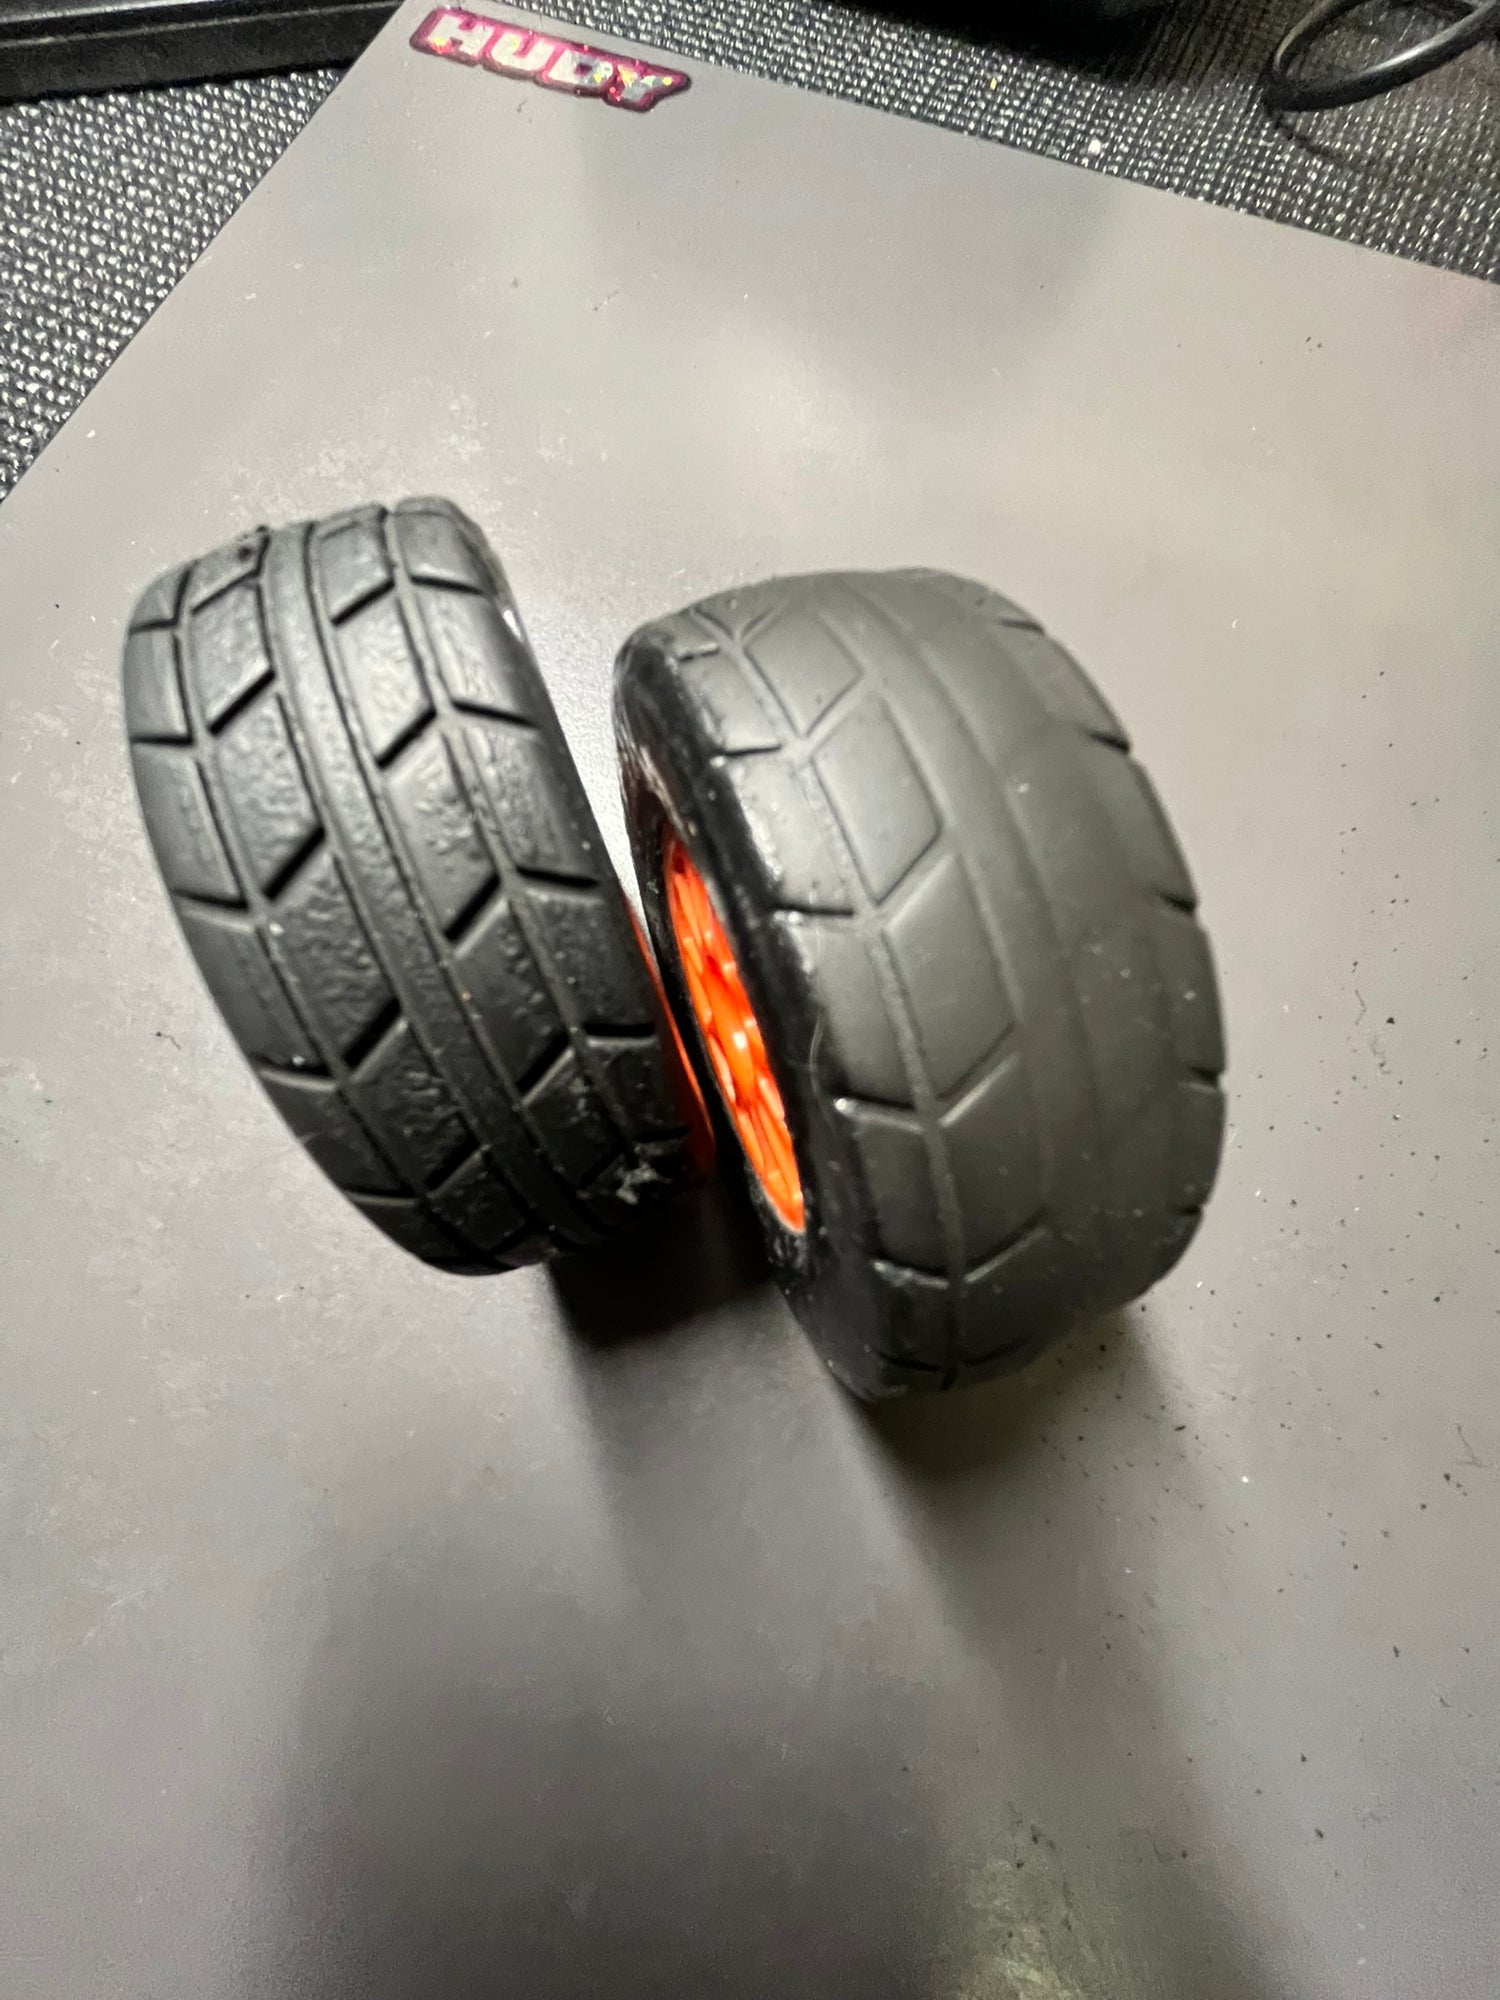
Sliding Tyres?
If you are finding the Tyres are actually getting less grippy - consider that you may not be driving them hard enough to actually 'scrub' the tyres. Slow or careful driving can actually lead to the tyres picking up road surface (additive, dirt and rubber) from the track. To remove this, wipe with brake cleaner and or run on concrete till tyres go from glossy to matt finish.
Tyre on left is like new - however has track pick up issue due to being driven to smoothly.
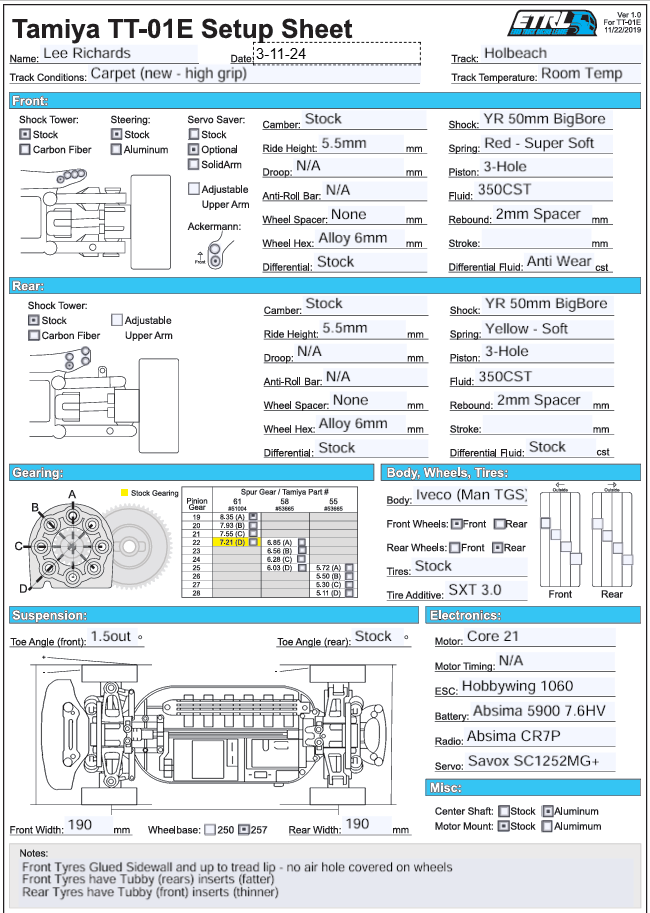
Team Driver Setups - Lee Richards (Holbeach Setup)
Front Diff: Use only light coating of Anti Wear grease
Rear Diff: Light use of standard kit grease
Yeah Racing Shocks - Built with 2mm O-ring inserted onto shaft to create 'droop'
Follow guide on foam inserts below and tyre prep.
Options:
- YR Big Bore 50mm Shocks (NOW UPDATED TO USE DSG set - NO NEED for BBG)
- Official Tamiya front adjustable Tie Rod Set
- Official Tamiya 20pc ball bearings
- YR alloy centre shaft
- Schumacher 19T Hardened Steel Pinion
More drivers to be added soon!
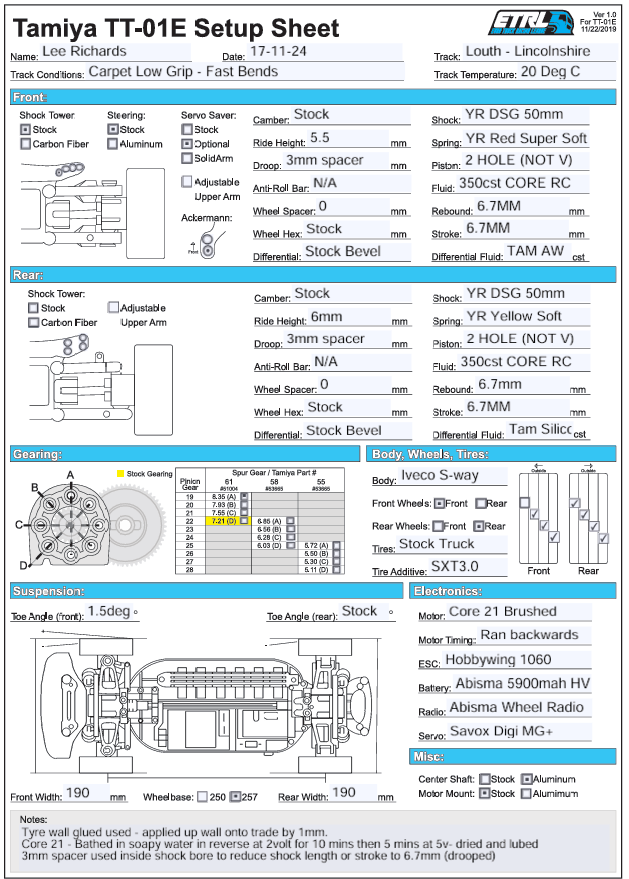
Team Driver Setups - Lee Richards (Louth Setup)
Front Diff: Heavy Covering on gear of Tamiya Anti Wear grease - including back of gears
Rear Diff: Light use of standard kit grease and light covering of AW grease on rear side of gears.
Yeah Racing Shocks - Built with 2mm O-ring and 1mm spacer inserted onto shaft to create 'droop' to 6.7mm shock travel on front and rear
Follow guide on foam inserts below and tyre prep.
Options:
- YR DSG 50mm Shocks
- Official Tamiya front adjustable Tie Rod Set
- Official Tamiya 20pc ball bearings
- YR alloy centre shaft
- Schumacher 19T Hardened Steel Pinion
More drivers to be added soon!
Resources

See our new YouTube Channel
Full of useful guides and tips!


